
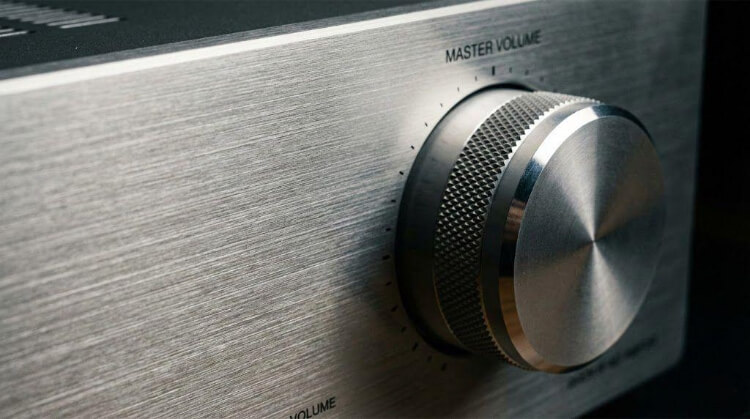
Look at the bezel of a high-end watch or the front panel of a premium refrigerator. Chances are, you aren’t looking at a perfect mirror. You are likely seeing a soft, textured surface with fine parallel lines. That is a brushed metal finish.
It looks expensive and feels modern. But for engineers and product designers, this is more than just a style choice. It is a functional solution to common manufacturing headaches. Unlike mirror polishing, where a single airborne dust particle can ruin a part, brushing is forgiving, consistent, and scalable.
If you are designing a part and need to decide between brushing, polishing, or sandblasting, you need the facts. This guide will walk you through exactly what this finish is, how we make it, and why it might be the right choice for your next project.
What Defines a Brushed Metal Finish?
A brushed finish is a surface treatment created by mechanically polishing the metal. Unlike a mirror polish, the goal isn’t to remove all surface imperfections. The goal is to create a uniform pattern.
The process leaves fine lines that usually run in one direction. This gives the metal a distinctive “grain,” similar to wood. The result is a satin or matte appearance that retains a metallic feel without the harsh reflection.
Mirror finishes reflect light directly, which causes glare. Brushed finishes diffuse it. When light hits a brushed surface, it scatters. This creates a soft, warm glow. This effect is why the finish is so popular in consumer electronics—it looks high-tech but remains soft to the touch.
The Engineering Behind the Brushed Finish Process
Aesthetics meet engineering in the manufacturing process. Understanding how we achieve this texture helps you specify the right requirements for your next project.
The Mechanics
How do we get those perfect lines? It comes down to controlled friction.
We use an abrasive belt, a wire brush, or a specialized scouring pad. As the tool moves across the metal surface, it removes a thin layer of material. This unifies the surface texture and cleans up the base metal.
The Variable of Grit
Not all brushed finishes look the same. The difference usually comes down to “grit”—the coarseness of the abrasive material.
- For a heavy, deep texture: We use a coarse grit, typically between 240 and 400. This creates visible, rugged lines often seen on heavy industrial equipment.
- For a silky, premium feel: We go finer. High-end finishes often use 800 to 1200 grit. At this level, the lines are barely visible to the naked eye, creating just a soft sheen suitable for luxury goods.
Technical Parameters
Precision is key. If we press too hard, we dig into the part. If we press too lightly, the texture is uneven. Standard industry data suggests an optimal brush pressure of around 2 to 3 kg per square centimeter.
Speed matters too. Brushes typically spin between 1500 and 2000 RPM. This ensures the lines remain straight and controls heat generation. This is critical because if the tool gets too hot, it can warp thin metal parts.
How to Brush Metal Finish: Step-by-Step
Understanding the workflow helps you anticipate lead times and potential quality issues. While the specific machinery varies, the core process follows three distinct stages.
Step 1: Surface Preparation
You cannot brush a dirty part. Before any abrasive touches the metal, the surface must be cleaned of oils, grease, and heavy oxidation. If the part has been laser cut, we must first deburr the edges. If we skip this, the brush will catch on the burrs, creating erratic, deep scratches that ruin the uniform look.
Step 2: The Brushing Pass
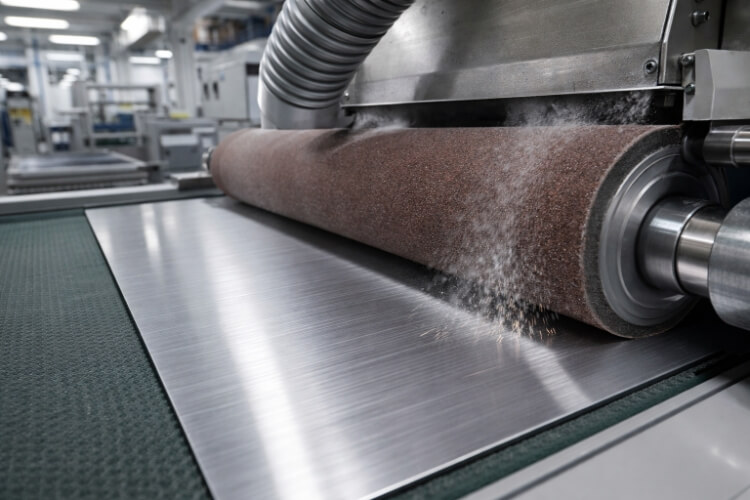
This is where the grain is applied. The metal is fed against a rotating abrasive belt or wheel.
- For Flat Sheets: We use a wide-belt sander. The sheet passes through on a conveyor belt, ensuring perfectly parallel lines across the entire width.
- For Curved Parts: Operators often use handheld rotary tools or robotic arms to follow the contour of the part, ensuring the grain flows naturally with the geometry.
Critically, the motion must be consistent. A hesitation in the feed rate creates a “dwell mark”—a visible band where the abrasive dug too deep.
Step 3: Cleaning and Sealing
Brushing generates fine metal dust and leaves the surface active. Immediately after brushing, the part goes through a wash cycle to remove particulates.
Depending on the material, this is the moment for protection. For aluminum, this might mean anodizing. For stainless steel, it often moves to a passivation tank to prevent future corrosion. Without this final step, the beautiful finish you just paid for will begin to degrade within weeks.
Functional & Mechanical Advantages
While the aesthetic appeal is undeniable, engineers rarely choose a finish based on looks alone. If you dig a little deeper, you will find that a brushed finish offers practical benefits that solve real-world manufacturing problems and improve your bottom line.
The “Concealer” Effect (and Production Yield)
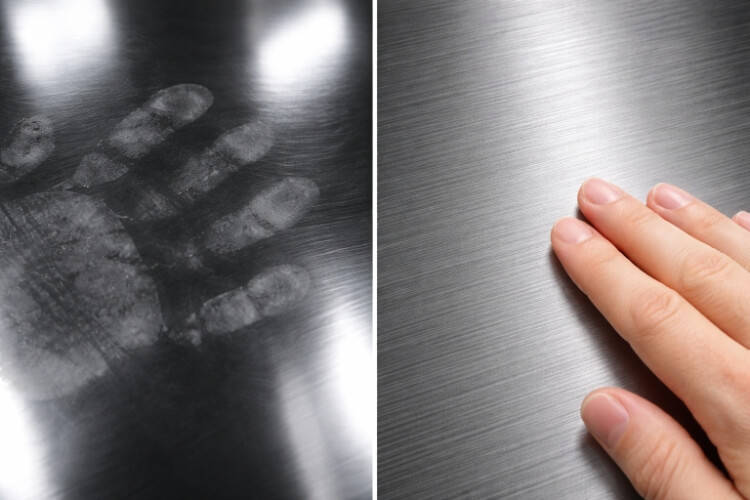
High-gloss or mirror finishes are unforgiving. Every fingerprint, dust particle, and minor scratch stands out. In a mass-production environment, this is a nightmare.
A brushed finish acts as camouflage. The textured pattern effectively hides surface defects like die-cast flow lines, extrusion marks, or minor handling scratches.
Why this matters for your budget: It significantly lowers the scrap rate. With a mirror finish, a tiny cosmetic imperfection often means scrapping the part. With a brushed finish, that same part passes QC. This higher yield directly reduces your per-unit cost.
Reduced Glare
In some environments, reflection is a safety hazard. Think of surgical instruments under bright operating theater lights or automotive trim in direct sunlight.
Because brushed metal diffuses light rather than reflecting it, it kills glare. This ensures the user isn’t blinded by a sudden flash of light, making it a functional requirement for optical instruments, medical devices, and automotive interiors.
Surface Physics: Stress and Strength
From a metallurgical perspective, brushing does more than scratch the surface. It can actually improve the part’s longevity.
Raw metal surfaces often have microscopic pits and irregularities. These can act as “stress risers”—weak points where cracks begin to form under heavy load. By brushing the surface, we remove these outer imperfections. This process smooths out the stress profile, potentially improving the fatigue strength of the component.
CRITICAL WARNING:
It is vital to remember that brushing creates an “anisotropic” surface. This means the physical properties of the sheet metal differ depending on the direction.
If you bend a sheet metal part parallel to the grain, it is much more likely to crack than if you bend it perpendicular to the grain. Always indicate the grain direction relative to your bend lines on your technical drawings.
Texture Typology: Linear vs. Rotary Brushing
When we say “brushed,” most people imagine long, straight lines. While that is the industry standard, it isn’t the only option. The direction of the brush stroke changes both the look and the function of the part.
Linear Brushing
This is what you see on 90% of brushed products. We use an abrasive belt to create unidirectional lines that run the entire length of the sheet or part.
Linear brushing is ideal for rectangular components, such as electronic chassis or architectural wall panels. It emphasizes the length and sleekness of the design.
Rotary (Concentric) Brushing
If you look at a thermostat dial or the bottom of a high-end stainless steel pot, you will see a different pattern. The lines form circles, radiating from the center like a sunburst.
This is rotary brushing. It requires spinning the part while contacting it with the abrasive. It is the go-to choice for round parts where linear lines would look awkward and misaligned.
Cross-Hatching
Sometimes, we layer the textures. Cross-hatching involves brushing the surface in one direction, then rotating it (usually 90 degrees) and brushing it again.
This creates a grid-like pattern. While less common for pure decoration, this texture provides excellent grip. It is often used on industrial flooring or tool handles where slipping isn’t an option.
The Material Match-Up: Navigating Alloys
You can theoretically brush any metal. However, the results vary significantly depending on the material’s hardness and composition. Some metals take the finish easily, while others fight the abrasive every step of the way.
Aluminum
Aluminum is the most popular choice for consumer electronics and brackets. It is lightweight and easy to machine. However, the specific grade matters.
Harder aluminum alloys, like 6061 or 7075, brush beautifully. They cut cleanly and leave a crisp texture.
Softer grades, like pure aluminum (1000 series), are difficult. Because the metal is “gummy,” it tends to clog the abrasive belt rather than scratching cleanly. This can lead to uneven, smeared textures. If you are specifying aluminum, stick to the harder alloys for the best visual results.
Stainless Steel
This is the industry standard for appliances and architectural trim. Stainless steel is harder than aluminum, so it requires more aggressive abrasives, but the result is incredibly durable.
There is often a debate between 304 and 316 stainless steel. Visually, they look identical once brushed. The difference is chemical. If your part is for a marine environment (saltwater), use 316. For a kitchen appliance, 304 is sufficient. Both grades handle the brushing process well, but 316 wears down belts slightly faster due to its toughness.
Titanium and Brass
These are niche choices. Titanium is notoriously difficult to process because it generates high heat and can spark, creating a fire hazard if not managed correctly. However, a brushed titanium finish offers a unique, dark grey luxury look.
Brass and copper are soft. They brush easily but tarnish quickly. If you brush these metals, you almost always need to apply a clear lacquer immediately to lock in the color.
Corrosion, Safety, and Cost
Every manufacturing decision has a downside. While brushed metal looks great, it introduces specific challenges that you need to plan for.
The Corrosion Risk
This is the most critical technical detail often overlooked.
When you buy a sheet of stainless steel, it has a natural “passive layer” that protects it from rust. When we brush that surface, we mechanically strip that layer away. We are exposing fresh, naked metal to the air. If you leave a freshly brushed steel part in a humid environment, it can rust—even if it is stainless.
The Fix:
- For Steel: Specify Passivation. This is a standard, low-cost chemical dip that restores the protective layer instantly.
- For Aluminum: You should apply a clear coat or anodizing. Brushing opens the pores of the metal, making it a magnet for dirt and oxidation if left unsealed.
Health and Safety
This concerns the shop floor, but it impacts your lead time.
Brushing creates fine metal dust. Aluminum dust, in particular, is highly flammable—even explosive—under the right conditions. To manage this safely, manufacturers often use “wet sanding” techniques or high-end dust extraction systems. This adds a layer of complexity to the setup compared to simple cutting or bending.
Cost Analysis
Where does brushing land on the budget sheet?
It is a mid-range cost finish, but it offers excellent value.
- Compared to Mirror Polishing: Brushing typically costs 30% to 50% less. Mirror polishing requires multiple stages of progressively finer sanding and buffing, which is labor-intensive. Brushing is faster and easier to automate.
- Compared to “As-Machined”: It is more expensive than leaving the part raw or simple tumbling, but it adds significant perceived value to the final product.
For most projects, brushing offers the “sweet spot.” You get a premium look that rivals expensive finishes, but at a price point that keeps your unit costs viable.
Final Verdict: Is Brushed Metal Right for Your Project?
You now know the mechanics, the materials, and the trade-offs. The final question is simple: Should you put this on your technical drawing?
To help you decide, use this quick decision matrix. It separates the ideal use cases from the potential failures.
When to Use It?
If your project meets these criteria, a brushed finish is likely your smartest option:
- The product is “High-Touch”: If users handle the product daily, you need this finish. It is the best way to hide the inevitable fingerprints and oil marks.
- You need a “Premium” look on a budget: You want the perceived value of a high-end metal part, but you cannot justify the 50% cost hike for mirror polishing.
- Glare is a safety issue: The environment has harsh overhead lighting, and readability is critical.
- The part is flat or tubular: These geometries are easy to process with standard automated belts, keeping your costs low.
When to Avoid It?
Think twice before specifying a brushed finish in these scenarios:
- Sterile Environments: Food processing lines or medical implants often require smooth surfaces. The microscopic grooves in a brushed finish can trap bacteria and moisture, making sterilization difficult.
- High Corrosion Zones: If the part will be exposed to saltwater or harsh chemicals without a clear coat, do not brush it. You are better off with electropolishing or a thick powder coat.
- Complex Geometries: If your part has deep recesses, sharp internal corners, or complex undercuts, a mechanical brush cannot reach them. You will end up with an inconsistent finish—half brushed, half raw.
A Note on Specifying: The “Ra” Value
If you decide to go ahead, do not just write “Brushed Finish” on your print. That is too vague. Vague drawings lead to disputes and inconsistent parts.
To get the result you want, you must specify the Surface Roughness (Ra).
- For a Standard Industrial Look: Specify Ra 0.8 – 1.6 μm.
- For a Fine, Decorative Look: Specify Ra 0.4 – 0.8 μm.
Still Deciding Between Brushed vs. Polished? Surface finish affects more than just looks—it impacts cost, lead time, and durability. If you aren’t sure which process fits your budget, let’s talk. Tell us about your application. We will recommend the most cost-effective material and finish combination for your specific needs.