Brass Finishes for Custom Parts: A Practical Engineering Guide
Brass Finishes for Custom Parts: A Practical Engineering Guide
Caleb Hayes
Published:
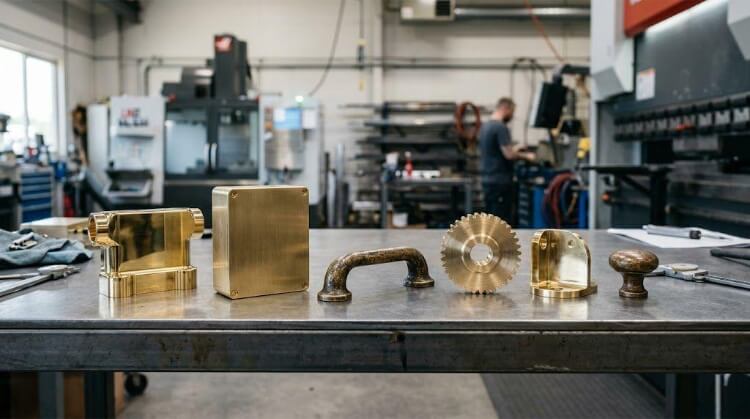
In custom manufacturing, choosing a brass finish is not only about appearance. It is also an engineering decision. The finish affects part life, production yield, and final assembly cost. This is true for precision CNC parts, sheet metal enclosures, and architectural hardware.
This guide explains brass finishes from a production point of view. The goal is to help you define your drawings more clearly, understand the limits of each process, and choose a finish that fits both performance needs and budget.
Brass Surface Finishes in Manufacturing
Brass Surface Finishes: Protection Comes Before Appearance
Before looking at textures and grain patterns, it helps to think of a surface finish as a layer between the brass and its working environment.
Finish requirements also affect production yield. A finish that needs a perfect, defect-free base surface will usually increase scrap. In contrast, a finish that can hide light machining marks or handling marks can help control cost per part and keep lead times more stable.
Every brass finish choice usually begins with one basic functional question:
Living Finishes (Unlacquered): The surface stays open to the environment. It will naturally oxidize, tarnish, and form a patina over time. This type of finish can hide small scratches better, but the color will keep changing. Color matching between different production batches is also harder to keep stable. This is a changing finish, not a fixed one.
Sealed Finishes (Lacquered or Coated): The surface is sealed to keep its original look. This approach slows oxidation, but it creates another risk. If the clear coat gets scratched or damaged during assembly, the supplier often has to strip and recoat the whole part. Depending on shop capacity, this step may add about 3 to 5 days to lead time.
Core Brass Finishes and Protective Coatings
To specify a brass finish correctly, you need to separate two things. One is the surface preparation, which creates the texture. The other is the protective coating, which acts as the top layer.
The table below gives a quick production-focused view of common brass surface preparations. The numbers are only rough references. Actual results depend on part shape, batch size, and base material quality.
The Engineer’s Reference: Brass Finishes (Note: Cost impact and yield range are rough estimates. Actual results depend on part geometry, batch volume, and base material quality.)
Surface Finishes
Typical Yield Impact
Scratch Resistance
Best Engineering Application
Polished
Low Yield / Premium Cost
Poor (Shows handling)
Optical housings, antimicrobial touchpoints
Brushed / Satin
High Yield / Cost-Effective
Excellent (Hides tool marks)
Electronics enclosures, precision components
Antique / Aged
Medium Yield / Moderate Cost
Good (Hides daily wear)
Architectural components, vintage hardware
The Three Main Surface Preparations
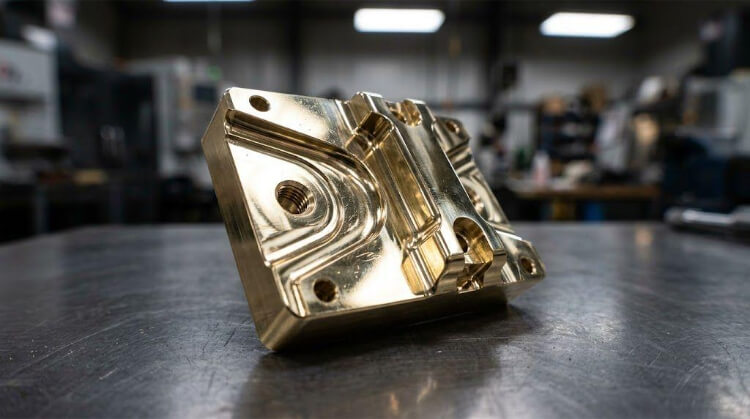
Polished Brass
Polished brass is mechanically buffed to a highly reflective surface. The target roughness is often below Ra 0.2 µm.
Production Reality: Polished brass looks premium, but it hides very little. The surface can easily show small pits, chatter marks, or material defects. If the part has heavy milling or stamping, a high-polish requirement often raises the scrap rate. A very clean polished result usually needs high-quality billet or sheet material instead of standard castings.
Common Scenario: This finish is often used for high-end optical housings or luxury hardware, where appearance matters more than base material cost.
Polished Brass Surface Detail
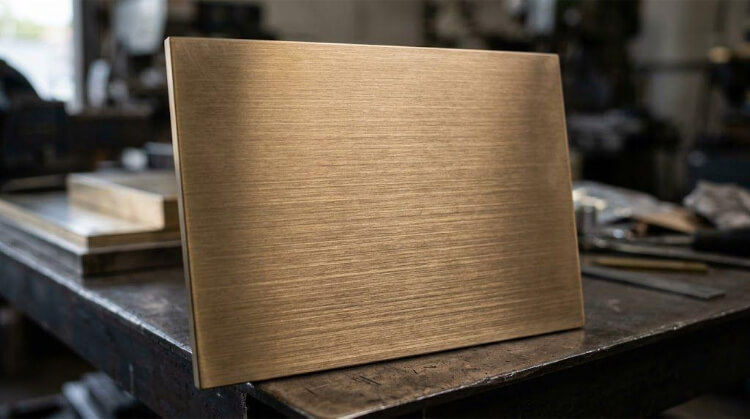
Brushed / Satin Brass
Brushed or satin brass is made by applying a directional abrasive pattern. For flat milled or stamped parts, a #4 brush finish is a common and widely accepted standard.
Production Reality: This finish is a practical choice for volume production. The matte linear grain can hide CNC tool marks, blend weld areas more smoothly, and reduce the visibility of light handling marks during assembly. This finish usually gives better batch consistency and higher yield.
Common Scenario: This finish works well for electronics enclosures or precision server chassis parts, where suppliers need to control visible marks without adding too much extra cost.
Brushed Brass Texture and Grain
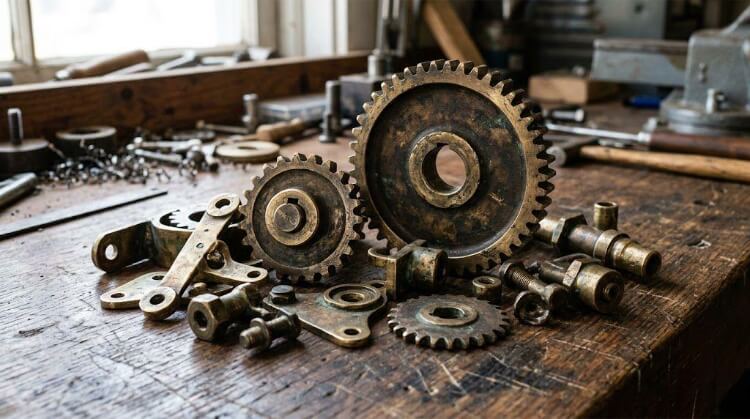
Antique / Aged Brass
Antique or aged brass is usually made through chemical darkening, followed by light sanding, tumbling, or a similar step that reveals some raw brass again.
Production Reality: Chemical aging is harder to control than standard mechanical finishing. Small color changes between batches are normal. If the assembly includes several visible parts that must match closely, you should define an approved golden sample with your supplier before mass production. That sample should clearly show the acceptable light-to-dark range.
Antique Brass Surface Variation
The Sealing Decision
After the surface preparation is finished, you need to decide whether the part should be protected against tarnish. If you choose a sealed finish, the two common options are clear lacquer and PVD.
Traditional Clear Lacquer: This coating is sprayed or dipped onto the surface. It is cost-effective and gives a good barrier against normal humidity. However, it can still degrade under UV exposure and can chip over time.
Practical Tip: You should specify the required ASTM B117 salt spray test hours in the RFQ. This requirement helps confirm that the coating thickness and protection level meet your project needs.
PVD (Physical Vapor Deposition): This process places the part in a vacuum chamber. The process bonds a very thin and hard layer of material, such as titanium nitride, onto the surface. PVD is highly durable, and it does not flake easily. It suits high-wear applications well.
Cost Reality: PVD is a strong engineering solution, but it costs much more than standard clear lacquer. In many cases, the price may be about 3 to 5 times higher. The process also depends heavily on batch volume, because vacuum chamber setup time often leads to stricter minimum order quantities.
Design for Manufacturability (DFM): Finishing Constraints
In real production, finishes are limited by physical contact and chemical behavior. If these limits are ignored during the CAD stage, the result is often production delay, uneven appearance, or extra manual finishing cost.
Line-of-Sight Limits in Mechanical Finishing
Polishing wheels and abrasive belts can only work where they can physically touch the metal. If a CNC milled part has deep pockets, blind corners, or sharp internal radii, it becomes very hard to create a uniform #4 brush finish or mirror polish in those areas. This is especially true when the pocket depth is more than twice the width.
The Engineering Fix: If an internal surface needs a uniform finish for function or appearance, a practical DFM solution is often to split the part into two pieces. The supplier can finish the pieces separately and then assemble them later.
Welded Assemblies and the HAZ Issue
If a design includes welded brass parts, the heat-affected zone changes the grain structure of the brass. In addition, if the assembly uses silver solder or another brazing filler, that filler usually reacts differently during chemical aging or mechanical polishing than the base brass does.
The Engineering Fix: This difference often creates visible halos or color mismatch at the joints. If the design needs a very even finish, the better approach is often to redesign the assembly with hidden mechanical fasteners instead of welds. Another option is to plan for a secondary heavy plating process.
PVD and the Faraday Cage Effect
PVD coating offers very good durability, but it is still a line-of-sight vacuum process. Deep cavities, narrow channels, and internal threads can block the coating from reaching inner surfaces. In many cases, deep internal features will stay mostly uncoated unless the supplier uses special internal anodes, which usually increase cost.
The Hidden Engineering Risks: Galvanic Corrosion and the Antimicrobial Tradeoff
Brass also has some material properties that are often misunderstood during assembly design. If these points are missed, the product may fail early in the field or lose a key material benefit.
Risk 1: The Galvanic Corrosion Trap
Brass is a relatively noble metal. When an unlacquered brass part touches a more active metal, such as 6061 aluminum or zinc-plated steel, and moisture is present, galvanic corrosion can start. In this case, the brass acts as the cathode, and the aluminum or zinc becomes the sacrificial metal that corrodes faster.
Common Scenario: An engineer designs an unlacquered brass heat sink and bolts it directly to an aluminum server chassis. After some time in a humid facility, the aluminum threads may start to break down.
The Engineering Fix: The design should include electrical isolation between the two metals. A clear non-conductive coating on the brass can help. Dielectric parts, such as PTFE washers or nylon bolt sleeves, can also prevent direct metal contact.
Galvanic Compatibility Quick Check (Note: This table gives general guidance for normal humid environments. Marine conditions or heavy salt exposure require stricter protection methods.)
Mating Metal in Assembly
Galvanic Risk with Raw Brass
Typical Required Action
Stainless Steel (304/316)
Low
Usually safe for direct contact
Copper / Bronze
Low
Safe for direct contact
Aluminum Alloys
High
Requires dielectric isolation or barrier coating
Zinc / Galvanized Steel
Severe
Strict mechanical isolation required
Risk 2: The Antimicrobial Tradeoff
Brass naturally has an antimicrobial effect. Its copper ions can damage bacteria and viruses when they touch the surface. This property makes brass useful for public hardware, medical equipment, and other high-touch applications.
However, there is a tradeoff in real design work. Engineers often add a clear lacquer or PVD coating to keep the brass bright and prevent tarnish. Once the surface is fully sealed, the copper ions can no longer interact with the outside environment. That means the antimicrobial effect is greatly reduced or completely blocked.
The Engineering Fix: If the part is meant for hygiene-related use, such as hospital handles or transit rails, the design usually needs a living finish with unlacquered brass. This choice means the surface will darken and tarnish over time. Stakeholders and end users need to understand that this visual change is part of how the material works.
The True Cost Drivers in Brass Finishing
When you compare quotes from different suppliers, it is easy to think that price differences come from chemicals or abrasives. In reality, the biggest cost drivers are usually manual labor and yield loss.
If you understand these factors during design, you can control your budget more effectively.
The Masking Penalty
Selective finishing always increases cost. For example, the outer surface of a part may need a clear lacquer, while internal M4 threads must stay bare for electrical grounding. In this case, the supplier cannot coat the whole part at once. A worker must block each hole with plugs or tape before coating, and remove them after.
The Financial Impact: Manual masking can add about $1.50 to $4.00 per unit, depending on part complexity and batch size. In large volumes, this cost adds up quickly. A better approach is to design parts that avoid selective masking when possible.
Process Order and Edge Damage
Some engineers assume that they can finish a flat brass sheet first and then machine or bend it. In most cases, later processes like milling, stamping, or bending will damage the finished surface.
The Financial Impact: Most complex parts must be machined first and finished later. Applying a consistent brush or polish on a completed 3D part takes more handling and setup than finishing flat material. This extra work increases the unit price.
Cost Hierarchy (General Guide)
The list below shows a simple way to estimate finish cost. These values are rough percentages based on the cost of a raw machined part. Actual values depend on part shape, volume, and material quality.
Raw / As-Machined (Living Finish): Base cost
Brushed / Satin + Clear Lacquer: +10% to 15%
Antique / Chemically Aged + Lacquer: +20% to 30%
High Polish + Clear Lacquer: +30% to 40%
PVD Coating: +150% to 300% or more
How to Define Brass Finishes Clearly on RFQs?
A vague finish note on a drawing often causes the most expensive problems. If a print only says “Brushed Brass” or “Clear Coat,” different suppliers will interpret it in different ways.
One supplier may quote a quick process with no coating. Another supplier may include multiple steps and a protective layer. The quotes will not match, and the final parts may not meet expectations.
To avoid this, your drawing should clearly define three parts of the finish.
A Clear Spec Formula: Use this structure on your drawings: [Surface Preparation] + [Coating or Treatment] + [Performance Requirement]
❌ Weak Example (Too vague): Finish: Antique Brass, Lacquered. (This does not define color, thickness, or performance.)
✅ Strong Engineering Example: Finish: Chemically aged to match Golden Sample #A2. Light edge relief applied. Sealed with matte acrylic lacquer, minimum thickness 0.5 mil. Coating must pass 96-hour ASTM B117 salt spray test with no visible defects.
✅ Example for Brushed Finish: Finish: #4 directional brush, parallel to long axis. Living finish with no lacquer. Parts must be clean and packed in VCI bags to reduce oxidation during shipping.
Conclusion
Brass is a high-value material. It is often used for its thermal behavior, antimicrobial properties, or visual appearance. The surface finish should be treated as a key engineering requirement, not a final detail.
A clear brass finishes strategy helps you control quality, reduce scrap, and keep costs stable.
Ready to move from prototype to production? It is much easier to solve finish and manufacturing issues early. At TZR, our engineering team supports both CNC machining and sheet metal fabrication. We help you balance appearance, function, and cost from the start.
If you have a design in progress, send your 3D CAD files. We can review your part, identify risks, and suggest a practical solution that fits your project.
Wonderful! Share this Case:
Caleb Hayes
Caleb Hayes has over a decade of experience in the sheet metal industry, specializing in precision fabrication and problem-solving. With a strong focus on quality and efficiency, he brings valuable insights and expertise to every project, ensuring top-notch results and customer satisfaction in all aspects of metalworking.