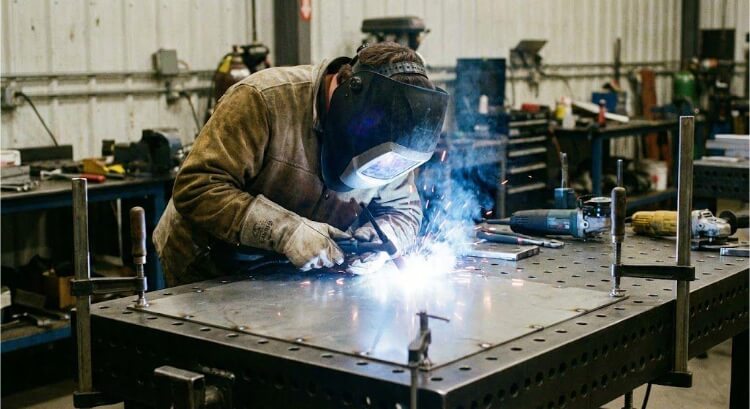
In almost every welding job, accuracy and alignment matter a lot. Before the final weld joins the parts for good, the pieces must stay in the right position. Tack welding helps make that happen.
This simple process uses small welds at key points to temporarily hold parts together. Even though the welds are small, they stop movement, keep the right spacing, and make the final weld easier and more reliable. Whether you’re working on sheet-metal enclosures or large frames, tack welding gives you a steady and accurate starting point.
What Is a Tack Weld?
A tack weld is a short weld used to hold metal parts together before the final weld. It works like a temporary metal pin, keeping parts steady but still allowing small adjustments when needed.
Typical tack welds are between 5 mm and 25 mm long — smaller ones for thin stainless panels, longer ones for heavy frames or tubes. These welds are not designed to bear a load. Their job is to hold the shape until the main weld permanently joins everything. When the final weld is applied, most tacks melt into the seam or disappear completely.
The strength of tack welding comes from accuracy, not size. By locking the setup early, tack welds keep the structure true from start to finish.
Why Tack Welding Matters?
Heat affects metal in unpredictable ways. As molten zones expand and cool, small differences can cause parts to twist or pull out of position.
Tack welding stops this movement by fixing key points along the joint. It evenly distributes heat stress and helps the workpiece retain its original shape.
For example, when welding 1.5 mm stainless panels, uneven heating can lift edges by 0.3–0.5 mm, which may affect sealing or assembly fit. Well-spaced tacks prevent those gaps before the main weld begins. On long seams, placing tacks every 75–100 mm can reduce distortion by about one-third while keeping alignment steady — no large jigs or clamps needed.
Example: A fabrication team once reduced panel warpage from ±1 mm to ±0.2 mm by switching from continuous clamping to evenly spaced skip tacks.
How Tack Welding Works?
Tack welding may look simple, but achieving good results depends on proper preparation and consistent parameters. Each stage — from surface cleaning to tack spacing — influences final alignment and weld quality.
Preparation and Setup
Good tack welding begins with clean surfaces and precise positioning. Remove rust, paint, and oil with a brush or solvent. Even a thin film can trap gas and weaken the weld. Use clamps or jigs to hold parts, and plan tack spacing according to thickness and joint design:
Choose the process that fits the job:
- TIG (GTAW): ideal for thin stainless or aluminum, low heat input.
- MIG (GMAW): fast and efficient for mild steel.
- Stick (SMAW): best for outdoor or structural work where precision is less critical.
Reduce the current by 10–20% compared with the main weld setting. The goal is light fusion — just enough to hold the parts, not to reinforce the joint.
Tack Welding Procedure
- Hold the torch or electrode at a steady angle (≈70–80° for MIG, 15° push angle for TIG) for accurate heat direction.
- Make short welds — 0.5 to 2 seconds — to form small, solid tacks without overheating.
- Check alignment often. After every few tacks, confirm spacing and adjust if necessary.
- Distribute heat evenly. Use skip-tacking by alternating between opposite ends of the joint to balance expansion and reduce stress.
- Let it cool naturally. Avoid forced cooling; rapid temperature changes can cause cracks.
This rhythm — heat, pause, verify, alternate — turns tack welding into a repeatable, controlled process.
In a well-managed sheet-metal line, a skilled operator can tack a 1-meter seam in under a minute with accuracy within ±0.2 mm, all without heavy fixtures.
Mini-summary: The mark of good tack welding is balance — equal heat, equal spacing, and equal control.

Common Types of Tack Welds
Each welding project needs a different balance of alignment, strength, and heat control. Choosing the right tack weld type helps parts fit better, speeds up production, and reduces distortion during final welding.
Standard Tack Weld
The standard tack is the most common type. It’s a short weld that joins two edges at even intervals — usually 5–15 mm long, spaced 75–100 mm apart.
In thin sheet-metal work, standard tacks keep gaps consistent and prevent movement. Since they’ll later blend into the main weld, they should be small, even, and placed exactly where the final seam will run.
Tip: For mild-steel sheets under 3 mm, keep tacks around 8 mm long and use 70–80 % of the full weld current to avoid burn-through.
Bridge Tack Weld
When two parts don’t meet perfectly, a bridge tack fills the small gap with a short arc of molten metal. It’s often used for large panels that sag slightly or for joints that can’t be perfectly flush before welding.
For stainless or aluminum sheets around 2 mm thick, bridge tacks every 100 mm can reduce edge mismatch by about 0.3 mm, eliminating the need for post-grinding or filler use.
Shop insight: One team reduced filler material by 25% by switching to bridge tacks for oversized enclosures.
Hot Tack (High-Energy Tack)
Thicker or high-conductivity materials like aluminum need hot tacks — made with slightly higher current and shorter arc time. They provide stronger fusion to keep heavy parts in place during the main weld.
Be careful not to overheat. A brief, intense arc of about 1.5 seconds gives a solid hold without distortion.
Engineering note: The tack area can reach over 1,400 °C, but controlled timing keeps stress low.
Skip or Progressive Tacking
Skip tacking isn’t a different weld type but a pattern for placing tacks. By alternating from one end of the joint to the other, heat stays balanced, and the seam remains straight.
It’s especially useful for thin stainless or aluminum, where continuous tacking can pull the joint out of alignment.
Advantages and Limitations of Tack Welding
Tack welding has clear strengths but also a few risks. Good tacks make final welding easier and more accurate. Poor ones can waste time and create defects.
Key Advantages
Accurate Fit-Up and Alignment
Tack welds hold parts steady before heat distortion occurs. They can keep gaps within ±0.2 mm, which is suitable for most precision fabrication jobs.
Distortion Control
Early anchoring cuts angular distortion by up to 40 % in thin metals and reduces twist along long seams. Balanced placement also spreads stress evenly.
Reduced Need for Fixtures
Well-planned tacks can replace complex jigs, saving time and cost — ideal for prototypes or small-batch builds.
Easy Adjustment
Tacks can be removed or reheated for fine alignment, unlike mechanical clamps.
Faster Workflow
Shops that use tack welding efficiently report 20–35% shorter setup times and fewer post-weld corrections.
Limitations and Common Risks
Residual Stress and Cracking
Overheated or oversized tacks can cause stress and lead to cracks during the final weld.
→ Fix: Keep tacks small and spaced evenly—alternate placement to balance heat.
Contamination and Porosity
Dirt or oil traps gas, weakening the joint by 10–15 %.
→ Fix: Clean all surfaces and use dedicated tools for stainless or aluminum.
Alignment Shift from Uneven Cooling
Tacking only one side can pull the joint out of square.
→ Fix: Use skip-tack symmetry — work side-to-side or inside-out.
Rework and Lost Time
Bad tacks waste hours. Some shops spend up to 15% of their welding time fixing them.
→ Fix: Inspect and correct before the final weld pass.
Not for Load Bearing
Tacks are temporary and not structural. Using them for support can cause failure during handling.
Best Practices for Quality Tack Welding
A tack weld may be small, but its accuracy shapes the quality of the entire weld. The following best practices help welders and engineers create strong, repeatable tack joints that maintain reliable, efficient production.
1. Control Heat Input and Spacing
Heat is the most important factor in tack welding. Too much heat causes burn-through; too little gives poor fusion. Set the current about 10–20 % lower than the final weld and keep the arc short — usually 0.5–2 seconds.
Spacing depends on thickness:
Alternate tack positions using skip tacking to spread heat evenly. This can reduce angular distortion by about 30% compared with one-directional tacking.
Example: A stainless-enclosure shop cut corner warping by one-third by simply alternating tacks from left to right.
2. Match Electrode and Filler Material
Use the same or a compatible filler for both the tack and the final weld. Different materials melt at different rates, and this can cause cracks when the final weld reheats the tack.
- For stainless steel, use low-carbon (L-grade) fillers to prevent carbide buildup.
- For aluminum, match alloy type — 4043 for cast parts, 5356 for high-strength extrusions.
If the part will be heat-treated later, confirm that the filler’s thermal properties match those of the base metal.
Shop note: Matching filler improved TIG tack fusion by 20% in one test, creating smoother, cleaner seams.
3. Maintain Clean Joints
Clean surfaces make clean welds. Oil, rust, or paint can trap gas and cause porosity that might not appear until final inspection.
Use solvent wipes, clean brushes, or light sanding before welding. Keep separate tools for stainless, aluminum, and carbon steel to avoid cross-contamination.
Reports show that around 60 % of tack weld porosity comes from surface dirt, not from heat or filler problems.
4. Keep Tack Size and Shape Consistent
Consistency matters. Uneven tacks melt unpredictably, affecting the final seam. Keep a width-to-height ratio of about 3:1, with a smooth, slightly convex surface.
In automated setups, use pulse settings or templates to maintain a consistent tack size. Tacks that are too tall resist melting; tacks that are too flat can crack under stress.
Example: A chassis maker reduced grinding time by 25% after using a “tack gauge” to keep every tack the same size.
5. Inspect and Repair Early
Even a tiny crack in a tack can ruin a full weld. Inspect each tack visually for porosity or undercut, and fix problems before continuing.
For critical parts, such as aerospace brackets, use dye penetrant testing to find micro-cracks. Early inspection avoids major rework later.
Efficiency tip: One stainless line reduced rework by 15 % through early tack inspection.
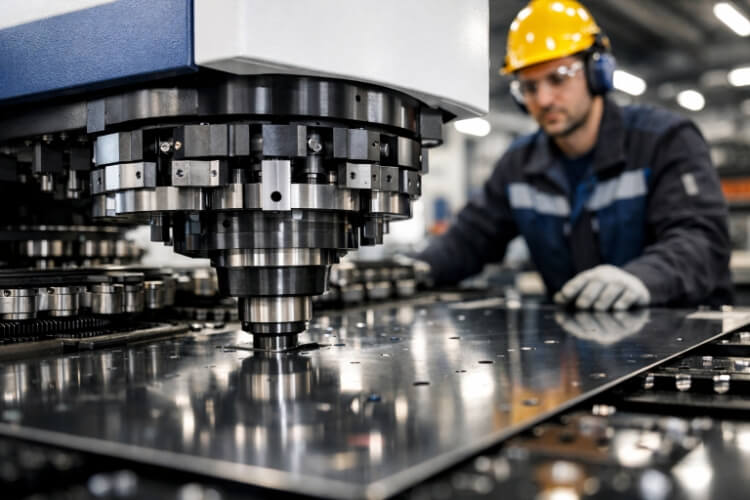
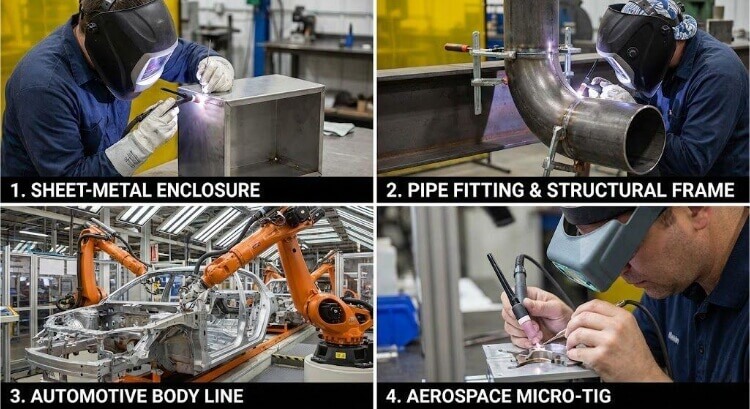
Applications Across Industries
Tack welding plays the same role everywhere: keep parts steady until it’s time for full heat.
It supports accuracy, efficiency, and consistency in many industries.
Sheet-Metal Fabrication
In sheet-metal work, tacks hold panels and brackets in position before final welding. Common uses include stainless steel electrical enclosures, aluminum enclosures, and custom frames.
By maintaining consistent spacing and alignment, TIG tacks prevent surface warping or “oil canning.” Well-placed tacks can cut finishing and correction time by up to 30 %.
Pipe Fitting and Structural Welding
In a pipe-and-frame assembly, tacks control the root gap and alignment during rotation and welding. Even a 1° misalignment can cause stress and leaks later.
Small, even tacks keep roundness and alignment stable. For large structures, alternating tacks also prevent diagonal distortion across beams.
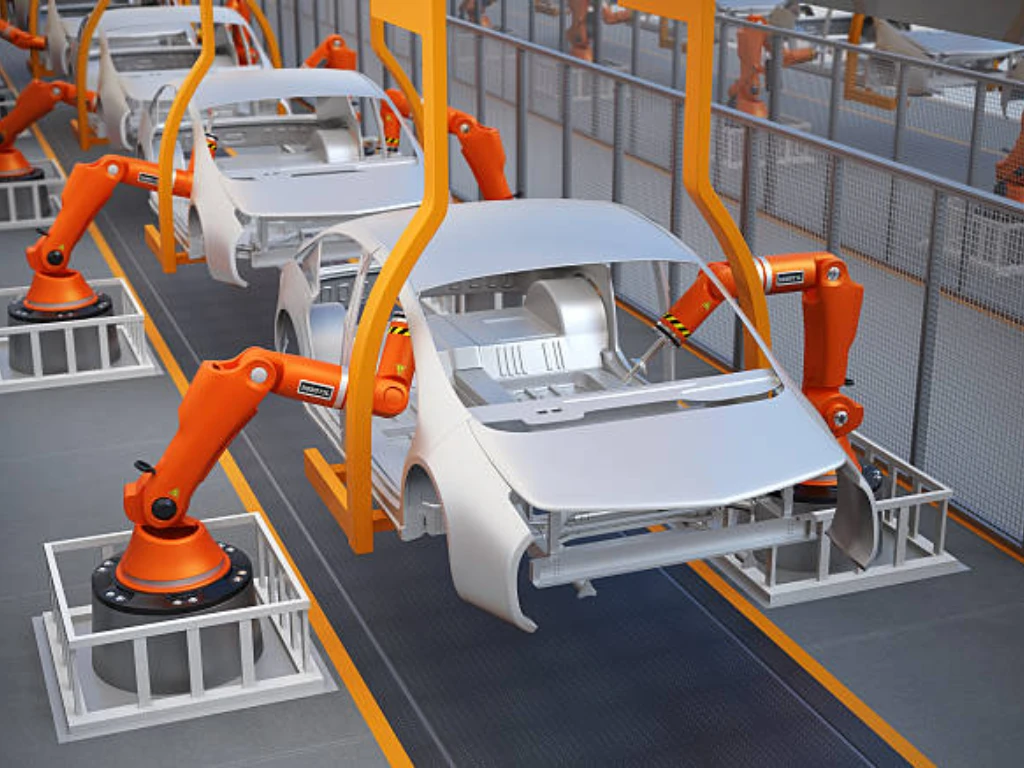
Automotive and Transportation
In vehicle manufacturing, tack welding sets the base for mass production. Robots use small tacks to position panels, frames, and exhaust parts before continuous or spot welding.
This ensures gap accuracy within ±0.2 mm, critical for fit and finish. Manual tack welding is also used for jigs, seat frames, and prototypes to check geometry before final joining.
Aerospace and Precision Components
In aerospace, medical, and electronics work, tack welding is used to manage geometry where precision is crucial. Micro-TIG or laser tacks — only 2–5 mm long — securely hold thin titanium, stainless, or aluminum pieces.
These tacks support later welding or brazing steps without heat damage. They’re vital when tight tolerances make rework unacceptable.
Tack Welding vs Spot Welding and Clamping
Tack welding is one of several methods for holding parts together before or during fabrication. In production, it often uses spot welding or mechanical clamping, depending on the level of precision, cost control, or speed required.
Comparison Overview
Tack Welding vs Spot Welding
Both processes use heat, but their purposes differ. Tack welds keep parts aligned for the final weld, while spot welds make the permanent joint between overlapping sheets.
Spot welding is well-suited to high-speed work on thin materials (0.8–2 mm), such as car panels. Tack welding allows flexibility — the parts can still be adjusted before final welding, which is ideal for prototypes or precise setups.
Tip: Use tack welds to hold parts in position for later continuous welding. Choose spot welding for permanent, high-volume bonding.
Tack Welding vs Clamping or Fixtures
Clamps hold parts without heat, but can’t resist movement once welding begins. When the joint expands under heat, clamps may loosen, leading to misalignment. Tack welding prevents that by locking the geometry under actual welding conditions.
In prototype work, replacing large jigs with tacks can cut setup time by 30–40 %. In high-volume production, a mix of clamps for setup and tacks for heat stability gives the best control.
Inspection and Quality Control
Even though tacks are temporary, their quality determines how accurate the final assembly will be. A simple inspection routine can prevent small flaws from becoming large weld problems later.
Visual Inspection
Check each tack under good lighting. A good tack has a smooth, even surface, full fusion at both edges, and no cracks or pores. Keep a height-to-width ratio near 1:3. If there’s any defect, grind it out and re-tack.
Tip: Use a 10× magnifier on stainless steel to spot micro-cracks that appear after cooling.
Dimensional and Alignment Verification
After tacking, check the part’s geometry. Use calipers, go/no-go gauges, or fixture references to confirm spacing and squareness. For long seams or round parts, measure at multiple points to catch distortion.
Always correct misalignment after cooling — bending hot joints can add hidden stress.
Mini-summary: Measure twice, weld once — accurate alignment saves rework time.
Non-Destructive Testing (NDT) for Critical Assemblies
High-value parts, such as pressure vessels and aerospace components, require additional verification. Non-destructive testing ensures tack welds are free of hidden defects.
Common methods include:
- Dye Penetrant Testing (PT): Finds surface cracks or porosity.
- Ultrasonic Testing (UT): Detects internal voids in thick sections.
NDT isn’t always needed for sheet-metal jobs, but it guarantees reliability for critical structures.
Cleaning and Integration into Final Weld
Before the final weld, clean each tack. Remove oxide or slag with a grinder or wire brush so the tack melts smoothly into the bead. This prevents inclusions and uneven bead profiles.
Quality goal: Keep the undercut below 0.5 mm and avoid pores larger than 0.3 mm before continuing.
Conclusion
Tack welding may look simple, but it shapes the accuracy and strength of every project. It maintains alignment, controls distortion, and provides welders with a stable starting point. When done properly — clean surfaces, controlled heat, balanced spacing — tack welding delivers predictable, repeatable quality.
Want to improve your welding process? Our engineers can review your setup, recommend ideal tack spacing and current settings, and help minimize distortion in your sheet-metal work. → Contact TZR’s technical team for expert fabrication support.
FAQs
What is the main purpose of tack welding?
The main goal of tack welding is to temporarily hold parts in position before applying the final weld. By securing the workpieces with small, evenly spaced welds, it prevents unwanted movement or distortion caused by heat expansion.
Can tack welds become part of the final weld?
Yes, they can. When tacks are properly placed along the joint line and kept clean from oxidation or contamination, they fuse seamlessly into the main weld bead. This integration strengthens the joint without leaving visible marks or weak spots.
How strong is a tack weld compared to a full weld?
A tack weld provides around 10–20 % of the strength of a full weld. It’s strong enough to hold components steady during handling or initial heating, but it’s not designed for structural loads.
What causes tack weld cracking?
Cracking usually happens due to excessive current, fast cooling, or contaminated surfaces. High heat can introduce stress concentrations, while dirt, oil, or oxidation prevents full fusion.To avoid these problems, use clean surfaces, proper heat control, and alternate tack placement to distribute stress evenly.
When is clamping better than tacking?
Clamping works best when parts need frequent repositioning, minimal heat input, or when the assembly will be disassembled later. For example, in prototype fitting or testing stages, mechanical clamps allow easy adjustments without adding heat.
Is tack welding used in automated systems?
Yes, tack welding is common in both robotic and semi-automated production lines. Robots use programmed tack points to pre-align panels, frames, or assemblies with consistent force and spacing. Automated tack welding also improves repeatability, reduces rework, and provides data for quality monitoring in modern manufacturing systems.