
 English
  Spanish
  German
  Russian
  Italian
  French
The main difference between brushed and polished stainless steel is surface texture. Brushed stainless steel features a matte, directional grain that hides scratches and fingerprints. Polished stainless steel offers a smooth, highly reflective mirror-like surface with superior cleanability.
Choosing the right finish isn’t just an aesthetic preference—it is a critical engineering decision that dictates your manufacturing cost, fabrication route, and long-term durability. Specifying the wrong finish on a custom metal part can lead to unnecessary processing fees, rejected inspections, or premature corrosion in the field.
To help you avoid costly mistakes, this guide covers what happens when you actually cut and weld these materials. We will look at real-world durability, fabrication costs, and the exact callouts your supplier needs to see on the drawing board.
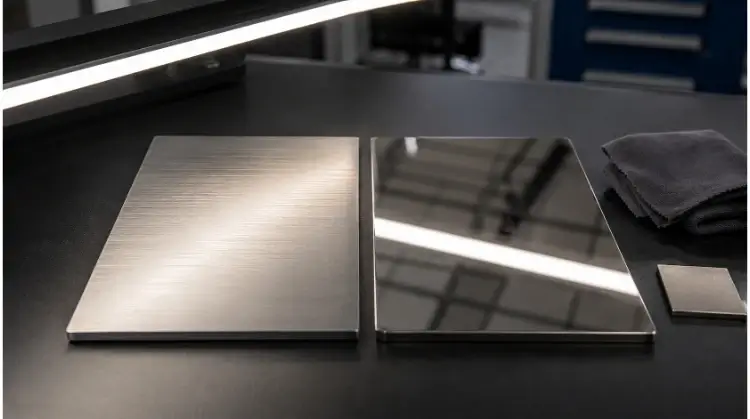
What Changes When Stainless Steel Is Brushed or Polished
Selecting a finish physically alters the micro-structure of the metal surface. This section details the mechanical processes and visual differences before factoring in downstream fabrication costs or field applications.
Brushed Grain and Low Reflectivity
A brushed finish is generated by applying targeted friction to the metal using abrasive belts, grinding wheels, or non-woven abrasive pads. This process cuts fine, parallel grooves into the surface of the stainless steel.
Because these microscopic grooves run in a single, directional pattern, they scatter incident light rather than reflecting it straight back. This scattering effect creates the muted, low-glare appearance. The final texture changes based on the abrasive grit used, the pressure applied by the operator or machine, and the feed direction. While a typical industrial brushed finish utilizes 150 to 180-grit abrasives, the exact visual outcome will always be influenced by the shop’s specific equipment and the initial condition of the raw sheet.
It is a common misconception that this mechanical abrasion hardens the surface; brushing removes a superficial layer of material but does not increase the hardness or structural strength of the base metal.
Polished Surfaces and Mirror Grades
Polishing requires a multi-stage abrasion process. The sequence starts with coarse abrasives to remove initial surface defects and progressively moves to finer grits, eventually finishing with buffing compounds and soft polishing wheels.
As the abrasives become finer, the surface scratches become shallower. This progression transitions the metal from a standard commercial bright finish to a high-gloss, and eventually, a highly reflective mirror finish. Because a highly polished surface reflects light efficiently, any underlying material defects, pitting, or inconsistent early-stage grinding marks will become highly visible.
While flat sheets are easily polished on automated lines, complex fabricated parts require manual, labor-intensive buffing to reach internal corners and tight radii. It is also important to note that mechanical polishing reduces surface roughness significantly but does not completely eliminate microscopic peaks and valleys. Specifying a “polished” part on a drawing does not automatically mean a flawless No. 8 mirror finish will be delivered.
No. 4, Satin, Hairline, and No. 8 Terms
The terminology used for stainless steel finishes often causes misalignment between procurement teams and the factory floor.
- No. 4 indicates a standard general-purpose brushed finish with a distinct, directional grain.
- Satin and hairline are common commercial terms, but they lack a strictly unified visual definition across different suppliers.
- No. 8 specifically describes a highly reflective, mirror-like finish.
- Terms like 2B, BA, 2J, and 2K belong to different mill finish classification systems and represent the material state before custom fabrication.
Furthermore, ASTM and EN nomenclature cannot always be swapped directly. Relying solely on an Ra value, a single grit size, or a generic finish code is often insufficient to define the complete visual appearance. Standard specifications, such as ASTM A480/A480M, primarily apply to flat-rolled stainless steel materials. Once a component is cut, bent, and welded, the fabrication drawing requires more specific acceptance criteria.
| Item | Brushed | Polished |
| Texture | Directional grain | Smooth surface |
| Reflectivity | Low to medium | Medium to very high |
| Fingerprint visibility | Lower | Higher |
| Scratch visibility | Usually lower | Usually higher |
| Local repair | Easier to blend | Harder to match |
| Typical production | Belt or wheel finishing | Multistage grinding and buffing |
Compare Each Finish in Real Operating Conditions
A finish must perform reliably in its final environment. The actual operating conditions dictate how the surface handles physical wear, chemical exposure, and routine maintenance.
Fingerprints, Scratches, and Field Repair
Brushed surfaces are generally better at hiding fingerprints and light surface marks because the existing directional grain masks minor defects. However, visual durability is not the same as actual wear resistance. If a sharp object scratches a brushed panel perpendicular to its grain, the mark will still be highly visible.
When field repairs are necessary, a brushed finish is easier to blend. Maintenance personnel can often use abrasive pads to manually rub out light damage by strictly following the original grain direction. During this process, operators must use dedicated stainless-steel tools. Using shared tooling is a common error that cross-contaminates the surface with carbon steel particles, leading to rapid localized rusting and rejected site inspections.
Conversely, localized field repair on a polished surface is highly prone to failure. Attempting to buff out a scratch manually usually results in a noticeable patch with a different gloss level than the surrounding area. Severe damage to a high-gloss or mirror finish often requires the entire visible face to be mechanically re-processed.
Cleaning, Hygiene, and Residue Control
There is a distinct difference between visual maintenance and hygienic cleanliness. Brushed surfaces maintain a visually “clean” appearance longer in public spaces, but their microscopic grooves can trap machine oils, fine powders, and biological residues.
Smoother surfaces are physically easier to deep-clean because there is less texture for contaminants to cling to. However, surface finish is only one component of a hygienic design; true cleanability also relies on full-penetration welds, smooth internal radii, and self-draining geometries. Mechanical polishing and electropolishing also perform differently and should be evaluated separately based on the application.
For food and medical applications, avoid writing subjective terms like “food-grade” or “medical-grade” on a drawing. Instead, specify the measurable roughness (e.g., Ra ≤ 0.8 µm for ASME BPE sanitary standards) and the specific passivation requirements required by the project.
Alloy Grade, Moisture, and Corrosion
Surface finish impacts corrosion resistance, but the underlying alloy grade remains the primary factor. A highly polished 304 stainless steel part is still likely to corrode in a marine environment where a standard brushed 316 or duplex alloy would perform reliably.
A smooth, polished surface does aid in corrosion prevention by shedding moisture and reducing the dwell time of corrosive agents. In environments with high chloride exposure, the microscopic crevices of a brushed finish can act as initiation sites for pitting corrosion.
Manufacturing processes introduce contamination risks regardless of the final finish. Weld heat tint must be completely removed, and any free iron transferred from press brakes or cutting beds must be cleaned. Fabricated parts typically require chemical pickling or passivation to fully restore the protective oxide layer before deployment.
| Application | Typical Finish | Main Concern |
| Machine enclosure | Brushed | Glare and fingerprints |
| Control panel | Brushed | Readability and handling |
| Elevator panel | Brushed or patterned | Scratch visibility |
| Decorative trim | Polished | Reflectivity and appearance |
| Commercial kitchen | Fine brushed or polished | Cleanability |
| Food-processing equipment | Defined low-Ra finish | Welds and residue control |
| Pharmaceutical vessel | Polished or electropolished | Hygienic design |
| Marine component | Fine brushed or polished | Alloy and chloride exposure |
How Cutting, Bending, and Welding Change the Finish
Fabricating a part changes how surface finishing must be approached. Engineers must understand how flat sheet processing, press brake forming, and welding dictate the final appearance and labor requirements on the factory floor.
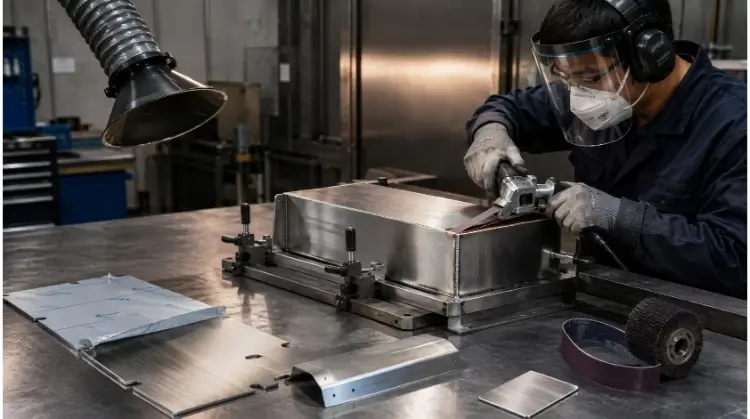
Grain Direction and Material Layout
Unlike a standard mill finish, brushed stainless steel has a strict orientation. Engineers must explicitly mark the grain direction on 2D flat patterns and 3D models. Failing to specify this often results in assembled enclosures where the grain runs horizontally on a door and vertically on the adjacent frame, leading to rejected parts.
During the programming phase, grain direction restricts how parts can be nested on a laser cutting bed. Normally, nesting software rotates parts freely to maximize material yield. However, locking the grain direction forces the software to maintain a specific orientation, which typically reduces material utilization. Furthermore, if left and right symmetrical parts are required, the flat patterns must be mirrored carefully to ensure the grain aligns correctly after bending.
Beyond aesthetics, grain direction impacts structural integrity. If a tight bend line runs exactly parallel to the material’s rolling and brushed grain direction, the stainless steel is significantly more prone to cracking. Engineers must balance the required visual orientation with safe bending radii.
Prefinished Sheet and Forming Marks
Procuring prefinished material (like a factory-applied No. 4 brush) can reduce post-fabrication finishing time, but it introduces handling risks. Protective PVC films are applied to minimize scratches during laser cutting and transit, but forming operations will still impact the surface.
Press brake tooling applies immense pressure, which often leaves visible witness marks or die lines on prefinished sheets. Mitigating this requires specialized non-marking dies or urethane films, which adds setup time but preserves the cosmetic finish. Deep drawing or complex forming stretches the material, which distorts the uniform linear grain into an uneven, stretched texture. Additionally, any welding operation will completely destroy the pre-applied finish in the heat-affected zone, and cut edges or pierced holes may require localized deburring that disrupts the surface.
| Route | Advantage | Main Risk |
| Finish before forming | Lower finishing cost | Forming and handling damage |
| Finish after fabrication | Better weld consistency | More labor and longer lead time |
Weld Blending and Limited Tool Access
Welding creates the most significant challenge for surface finishing. Grinding a weld flush destroys the surrounding surface finish. For brushed parts, operators must manually re-grain the area. It is important to note that a manual, localized repair will rarely perfectly match a continuous, machine-applied factory grain; the goal is a visually acceptable blend.
For polished parts, aggressive weld grinding often creates a localized “waviness” because it is difficult to maintain a perfectly flat surface with handheld tools. The heat-affected zone also requires complete removal of oxides and heat tint to restore corrosion resistance.
Geometry dictates the finishing quality. Inside corners, deep channels, and tight return flanges physically restrict access for grinding wheels and polishing belts. If a part has multiple intersecting welds in a tight corner, achieving a uniform finish is highly labor-intensive. Furthermore, aggressive grinding generates significant heat, which can cause thin-gauge sheet metal to warp and alter the dimensions of carefully machined radii.
The Real Cost of Brushed and Polished Parts
Understanding the cost drivers of surface finishing prevents procurement surprises. The price of a finished part is rarely just the cost of the raw material plus a flat finishing fee; it depends heavily on the processing route, manual labor, and rejection risks.
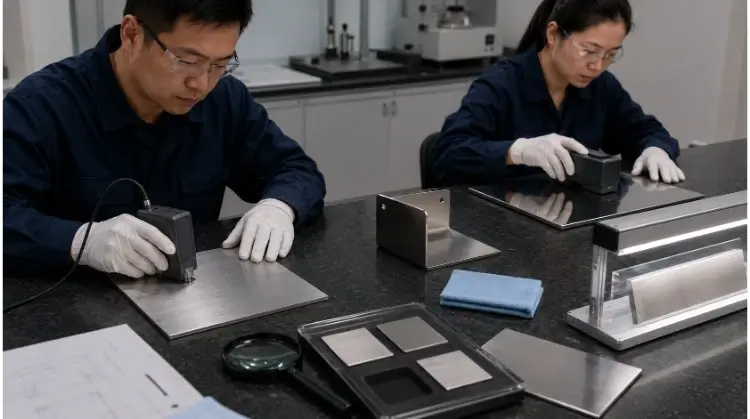
Starting Surface and Processing Route
The final price tag starts with the raw material condition. Procuring a 2B, Bright Annealed (BA), or pre-brushed sheet presents a different baseline cost. If the raw material has deep scratches or mill scale, the factory must spend additional time in the coarse grinding phase before the actual brushing or polishing can begin.
Cost also depends on whether the part requires single-sided or double-sided processing. The manufacturing route—whether a supplier is quoting a prefinished sheet with simple edge deburring, or a fully fabricated assembly that requires post-weld whole-part finishing—will drastically alter the quote. Furthermore, processing a small CNC machined component requires fundamentally different fixtures and tool paths compared to large sheet metal panels, meaning pricing structures cannot be directly compared.
Manual Labor, Geometry, and Production Volume
Automation controls costs, while manual labor drives them up. Large, flat panels are processed efficiently through automated wide-belt sanders, keeping the per-part cost low. However, manual intervention is required the moment a part has welds, bends, or complex contours.
Complex geometry increases the time spent changing hand tools, repositioning the part, and checking visual consistency. High-grade polished finishes demand continuous intermediate inspections between grit changes; missing a deep scratch at an early stage means the operator must restart the entire process later. For small batch orders, setup and preparation costs constitute a large percentage of the final price. As production volume increases, specialized fixtures and automated finishing cells become viable, which stabilizes lead times and improves part-to-part consistency.
Surface Protection, Rework, and Delivery Risk
Because visual standards like “glossiness” can be highly subjective, strict appearance requirements increase the expected scrap rate. Suppliers factor this inherent rejection risk into their initial quotes. To mitigate this risk, buyers and suppliers must agree on physical Master Samples (Boundary Samples) before mass production begins.
If a finished batch shows an inconsistent appearance, it often leads to full-face rework. As mentioned earlier, local rework on a polished mirror surface usually creates a mismatched gloss patch, forcing the supplier to strip and re-polish the entire panel.
Finally, preserving the finish during transit adds to the bill of materials. Polished components often require protective PVC films, interleaving paper, foam isolation, and individual crating to prevent friction damage during shipping and final assembly.
RFQ Checklist for Stainless Steel Finishes
To receive accurate and comparable quotes from manufacturing partners, ensure your drawings or RFQ documents clearly state:
- Base Material: Grade and thickness (e.g., 316L, 1.5mm)
- Initial Surface: Raw material condition (if mandated)
- Target Finish: Specification (e.g., No. 4 Brushed, No. 8 Mirror, specific Ra)
- Treatment Areas: Clearly distinguish visible vs. non-visible faces
- Grain Direction: Explicitly marked on 2D/3D files
- Weld Expectations: (e.g., ground flush, re-grained, blended)
- Production Volume: Batch size for tooling amortization
- Acceptance Criteria: Ra limits, visual standards, Master Sample requirements
- Packaging: Specific protective film or crating requirements
Conclusion
Choosing between a brushed and polished stainless steel finish is a functional engineering decision, not just an aesthetic one. Brushed finishes work well for high-frequency handling areas, industrial enclosures, and low-glare environments where hiding daily wear is a priority. Conversely, polished finishes are necessary for high-reflection decorative trims and applications requiring a smooth, hygienic surface that facilitates frequent deep cleaning.
However, surface finish cannot replace proper material selection; true corrosion resistance relies on specifying the correct alloy grade, strictly preventing carbon steel cross-contamination, and executing proper post-weld passivation. Furthermore, engineers must recognize that complex geometries, tight internal corners, and stringent cosmetic standards will significantly increase manual labor and overall part costs.
Unsure which finish suits your custom metal parts? Send us your drawing, stainless steel grade, visible surfaces, and target finish. Our engineers will provide a free DFM (Design for Manufacturing) review to evaluate your grain direction, fabrication route, and weld treatment expectations. We help you spot costly finishing mistakes on the drawing board, long before the metal is cut.