
 English
  Spanish
  German
  Russian
  Italian
  French
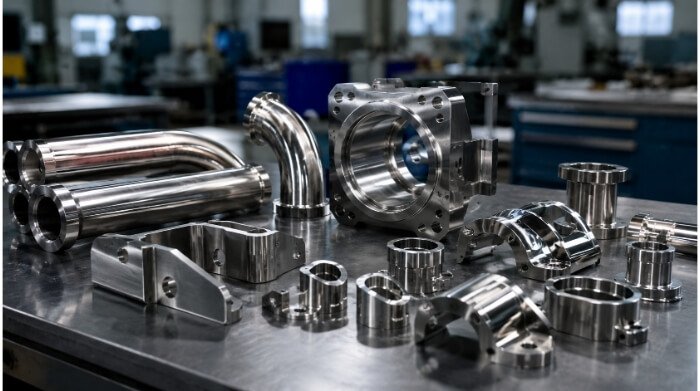
Mechanical polishing uses abrasive friction to physically cut metal, making it ideal for leveling heavy weld seams. Electropolishing uses an electrochemical bath to dissolve microscopic peaks, producing an ultraclean, highly corrosion-resistant finish without embedding abrasive debris into the surface.
Selecting the right surface finish is rarely just a cosmetic choice. For engineering and procurement teams, the decision directly impacts part tolerances, field performance, and unit cost. While both methods improve the surface, applying the wrong process can lead to rusted sheet metal enclosures, out-of-tolerance CNC machined components, or blown budgets due to unnecessary manual labor.
This guide bypasses basic chemistry textbooks to provide a practical, shop-floor comparison. Below, we break down exactly how material removal rates, specific part geometry, and production batch sizes should drive your final manufacturing decision.
| Comparison | Mechanical Polishing | Electropolishing |
| Removal method | Abrasive cutting | Electrochemical dissolution |
| Main purpose | Remove visible defects and control texture | Improve microscopic surface condition |
| Surface direction | Directional | More uniform |
| Deep scratches | Effective | Limited |
| Complex areas | Limited by tool access | Limited by current distribution |
| Dimensional effect | Local and operator-dependent | Process-controlled but geometry-dependent |
| Small batches | Often more economical | Setup cost may be higher |
| Batch consistency | Depends on process control | Usually easier to repeat |
How Electropolishing and Mechanical Polishing Remove Material?
To select the right finish, it is necessary to understand what each process can effectively target. Expecting either process to fix underlying machining or fabrication defects often leads to rejected parts.
Mechanical Polishing
Mechanical polishing is primarily used to remove larger, visible surface defects. Because it relies on physical contact with abrasive belts, wheels, or pads, it applies localized pressure to cut away material.
This makes it highly effective for grinding down heavy weld reinforcement on sheet metal enclosures, or smoothing out deep step-marks left by CNC milling.
However, mechanical polishing leaves its own microscopic scratches in the direction of the abrasive movement. It can also smear metal over micro-voids, trapping abrasive dust and contaminants beneath the surface.
Electropolishing
Electropolishing works at a microscopic level. The process preferentially dissolves the highest microscopic peaks of the metal surface faster than the valleys. This makes it highly effective for removing light burrs, micro-cracks, and surface contamination left behind by cutting tools.
However, electropolishing is not a leveling process for large defects. It cannot remove deep gouges, heavy scratches, or casting porosity.
In fact, because electropolishing creates a highly reflective surface, it often makes deep underlying scratches more visible. It should never be used as a substitute for proper mechanical blending or weld grinding.
Balancing Surface Finish with Dimensional Precision
Surface finish and dimensional accuracy are closely linked. Both mechanical and electropolishing remove material, meaning both will inevitably affect the final dimensions of the part.
Surface Roughness
It is important to note that a bright appearance does not necessarily mean a low surface roughness (Ra). Mechanical polishing can significantly lower the Ra value by physically flattening the surface, but it leaves a directional texture.
Electropolishing reduces the initial Ra value (often by about 50%, depending on the starting surface) and creates a non-directional, uniform finish. A surface treated with electropolishing may have a higher measurable Ra than a mechanically polished surface, but it will often appear brighter and smoother at the microscopic level.
Corrosion and Cleanability
For stainless steel parts in medical, food processing, or semiconductor applications, cleanability and corrosion resistance are usually the priority. Mechanical polishing can embed free iron and abrasive particles into the metal surface, which may serve as initiation sites for rust. Parts polished this way usually require a separate chemical passivation step.
Electropolishing naturally dissolves free iron and surface impurities. As the iron and nickel are removed, the surface becomes enriched with chromium, forming a thick, uniform passivation layer. This significantly improves the metal’s corrosion performance and prevents bacterial adhesion.
Burrs and Edges
Mechanical methods are better suited for removing heavy burrs or breaking large, sharp edges. However, the results depend heavily on operator skill, and edges can easily become unevenly rolled.
Electropolishing is highly effective for removing fine, microscopic burrs—such as those left by laser cutting or micro-machining—because current density concentrates on sharp protrusions. Engineers should note that electropolishing will slightly round all sharp edges and corners exposed to the electrolyte.
Material Removal and Critical Dimensions
Both processes are subtractive. The amount of material removed during electropolishing typically ranges from 5 µm to 25 µm (0.0002″ to 0.001″) per surface. This removal rate is controlled by time, temperature, current density, and the specific alloy, making it highly predictable.
Mechanical polishing removal rates are more variable and depend on the operator, applied pressure, and abrasive grit. For parts with critical dimensions—such as precision H7 holes, fine threads, sealing surfaces, or thin edges—uncontrolled material removal can cause the part to fall out of tolerance.
Pro Tip: Masking precision holes or internal threads drives up the per-part cost significantly. For high-volume production, a more cost-effective strategy is to electropolish the entire part first, and perform a final precision reaming or CNC tapping operation afterward.
Where Material and Part Geometry Change the Result
Surface finishing is not a magic wand. The underlying alloy and the physical shape of the part heavily dictate what is actually achievable on the shop floor.
Stainless Steel Grades
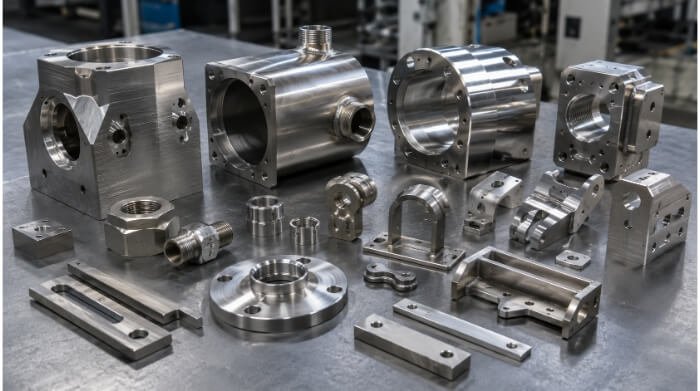
Do not assume all stainless steel will achieve the same bright, corrosion-resistant finish. The 300 series (like 304 and 316) is the gold standard for electropolishing, yielding a highly reflective, uniform surface. The 400 series contains less nickel and chromium, often resulting in a matte or hazy appearance.
⚠️ Design Warning: Do not assume all 300-series stainless behaves the same. Free-machining grades like 303 contain sulfur to improve CNC chip breaking. During electropolishing, these inclusions dissolve faster than the base metal, causing severe surface pitting.
Aluminum and Titanium
While it is possible to electropolish aluminum and titanium, they require completely different chemistry than stainless steel. These alloys demand highly aggressive electrolytes, distinct voltage parameters, and specialized equipment. The material grade and its starting surface condition will significantly impact the final result, making the process much more expensive and less commonly available.
Mixed-Metal Assemblies
Never specify electropolishing for an assembly containing dissimilar metals.
If a stainless steel sheet metal part includes pressed-in brass inserts, copper brazing filler, or zinc-plated fasteners, the electropolishing tank will act as a battery. It will aggressively attack and dissolve the less noble metals in minutes, effectively destroying the part. Mixed-metal assemblies must be processed separately before final assembly, or you must rely on manual mechanical polishing.
Internal Features
Mechanical tools cannot reach inside deep holes, narrow slots, or enclosed cavities. Electropolishing can process internal channels, but only if the electrical current and fluid can flow freely.
Deep blind holes suffer from poor current distribution (the Faraday cage effect) and tend to trap oxygen gas bubbles during the chemical reaction. This leaves unpolished, localized patches. To successfully electropolish complex internal cavities, the factory must design custom auxiliary cathodes to direct the current.
🛠️ Engineering Tip: If your CNC machined part has intersecting deep holes or complex internal channels, send your CAD file to our engineering team for a quick manufacturability review before locking in the finish.
Welded Parts
Electropolishing is excellent for removing light heat tint and cleaning up the heat-affected zone around a weld, improving the microscopic corrosion resistance of the joint.
However, electropolishing will not level a heavy weld reinforcement. More importantly, the chemical dissolution process will expose and enlarge any hidden porosity, crevices, or micro-cracks in the weld. Mechanical grinding is often required first to level the bead, followed by electropolishing to clean the surface.
What Determines Cost, Lead Time and Batch Consistency
Two identical parts can receive wildly different surface finishing quotes. Understanding the actual cost drivers helps procurement teams evaluate supplier pricing accurately and avoid hidden fees.
Setup and Labor
Mechanical polishing costs scale linearly. The price is driven by operator time, abrasive wear, part manipulation, and multi-grit stepping.
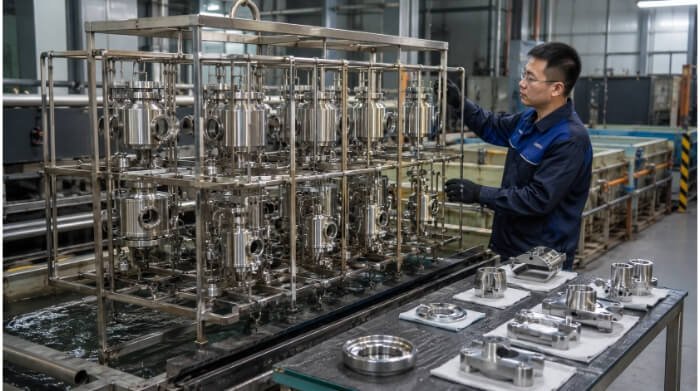
Electropolishing costs are heavily front-loaded. The labor goes into tank preparation, parameter setting, pre-cleaning, and chemical neutralization. Once the process is dialed in and controlled, the actual run-time labor per part drops significantly.
Batch Size
For a small prototype run of simple parts, mechanical polishing is often cheaper because it requires zero specialized tooling.
For batch production, electropolishing usually offers a better per-part cost and superior consistency. However, do not use a fixed quantity as a strict cutoff. A part’s physical size and racking stability play a much bigger role in determining the breakeven point than just the raw order volume.
Racking and Masking
Every part going into an electropolishing tank needs a solid electrical connection. Where the fixture grips the metal, a small “rack mark” will remain.
If your drawing specifies a large cosmetic area with “no rack marks,” the factory must design complex custom fixtures. Similarly, if critical machined threads must be masked to prevent dimensional loss, the manual labor involved will spike the unit cost. The more critical surfaces you define, the higher the tooling and masking costs.
Part Size and Geometry
Do not estimate processing costs based solely on surface area. Tank space, part weight, and handling risks matter just as much.
💡 Cost Trap: A flat 10×10-inch plate and a 10×10-inch welded box have roughly the same surface area, but the box costs much more to electropolish. It takes up more physical tank space, carries expensive acid out of the tank in its internal corners (drag-out), and requires specific drainage angles to prevent chemical entrapment.
Rework and Total Cost
Procurement should not evaluate quotes based solely on the bottom-line surface treatment price.
A cheaper mechanical polishing quote often hides downstream costs: extra surface preparation, manual dimensional rework, rejected lots due to inconsistent finishes, or worst of all, parts rusting in the field. When stability, cleanliness, and repeatability matter, the upfront setup cost of electropolishing pays for itself quickly.
How to Specify, Inspect and Select the Final Process
The best surface finishing process will fail if it is not clearly communicated to the shop floor. A vague requirement on a print leaves the final result entirely up to operator interpretation—which usually leads to rejected assemblies and missed deadlines.
To get exactly what you need, your engineering drawings must explicitly specify:
- The exact process (Mechanical Polishing or Electropolishing)
- Specific areas to be treated
- The material grade and starting surface condition
- Masked areas (surfaces that must not be processed)
- Acceptable rack contact points (for electropolishing fixtures)
- Critical dimensions to be held after finishing
Roughness and Appearance
Do not rely on subjective terms like “mirror finish” or “bright finish.” These mean completely different things to different suppliers. Instead, clearly define the measurable requirements:
- The absolute Ra limit (e.g., Ra < 0.4 µm)
- The specific measurement location and direction
- The acceptable texture direction (if mechanical processing is used)
- Gloss levels
💡 Quality Tip: For highly cosmetic parts, the most reliable standard is an approved physical sample (a “golden limit sample”). Provide this to your manufacturing partner before production begins so quality control has a physical baseline.
Dimensional Inspection
Because both processes subtract material, all critical dimensions must be re-verified after the surface treatment is complete.
Make sure your quality control team inspects precision hole diameters, fine threads, material thickness, mating surfaces, and sealing edges on the final, treated part—not just the machined blank. Final acceptance must always be based on the post-treatment state.
The Combined Approach
For many high-performance parts, it is not an either/or decision. The most robust manufacturing routing often combines both methods:
Mechanical grinding → Fine polishing → Cleaning → Electropolishing
In this workflow, the mechanical treatment handles the primary stock removal: leveling weld reinforcement, removing deep scratches, and erasing heavy CNC machining marks. The electropolishing step follows up to improve microscopic roughness, guarantee cleanability, remove light burrs, and maximize the corrosion performance of the stainless steel surface.
Process Selection Matrix
| Project Requirement | Recommended Direction | Main Reason |
| Deep scratches | Mechanical polishing | Removes more local material physically |
| Heavy welds | Mechanical polishing | Levels visible weld reinforcement |
| Brushed finish | Mechanical polishing | Produces a controlled, directional texture |
| Small simple batch | Mechanical polishing | Lower upfront setup requirements |
| High cleanliness | Electropolishing | Reduces microscopic retention areas |
| Better corrosion performance | Electropolishing | Improves stainless surface condition and passivation |
| Small burrs on complex parts | Electropolishing | Reaches areas beyond physical abrasive tools |
| Deep internal cavities | Engineering review | Current distribution and tooling must be verified |
| Critical holes and threads | Masking / Post-machining | Both processes change final dimensions |
| Very low roughness | Combined process | Treats both macroscopic and microscopic defects |
| Mixed-metal assemblies | Separate process review | Materials will dissolve differently or cause galvanic reactions |
| Cosmetic mirror finish | Starting-surface review | Electropolishing cannot remove deep underlying defects |
Conclusion
Choosing between electropolishing and mechanical polishing comes down to understanding the physical realities of the shop floor. Mechanical polishing relies on abrasive force to level large defects and shape textures, while electropolishing uses chemistry and electrical current to achieve microscopic cleanliness, precision deburring, and enhanced corrosion resistance.
Neither process can fix a poorly machined or badly welded part. The best results require selecting the right material grade, designing with the finishing process in mind, and setting strict, measurable quality standards on your drawings.
Ready to lock in the manufacturing process for your next project?
Whether you need precision CNC machined components with tight H7 tolerances or complex custom sheet metal enclosures, surface finishing shouldn’t be an afterthought.
Upload your CAD files to our engineering team today. We’ll run a fast, honest manufacturability review and give you a production-ready quote that accounts for both absolute precision and the final surface finish.