
 English
  Spanish
  German
  Russian
  Italian
  French
Stick welding (SMAW) is highly effective for stainless steel in drafty outdoor environments or heavy structural repairs where TIG is impractical. Using low-carbon electrodes like E308L maintains corrosion resistance. However, high heat input and slag removal make it unsuitable for thin sheets under 1.5mm or high-volume production.
Many fabrication shops automatically default to TIG welding for all stainless steel projects. But in unpredictable field environments, on thick heavy-duty assemblies, or when dealing with rust-prone dissimilar joints, the simplicity of stick welding (SMAW) holds a distinct advantage.
The engineering challenge isn’t just striking the arc—it’s controlling extreme thermal distortion, preventing chromium depletion in the heat-affected zone, and keeping manual cleanup times from destroying your profit margins. This guide breaks down exactly when stick welding makes financial sense, how to select AWS-certified electrodes, and the strict joint preparation standards required to avoid expensive rework.
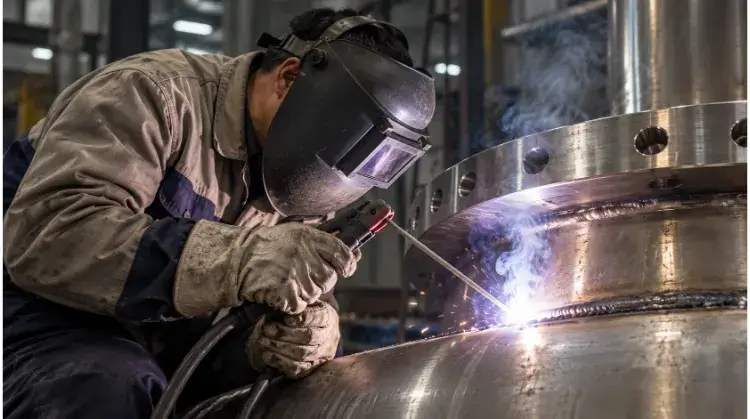
When Stick Welding Stainless Steel Makes Sense?
Stick welding isn’t a universal solution for every stainless fabrication order. Knowing exactly where it excels—and where it fails—prevents expensive rework and ruined parts.
Field Work and Repairs
Shielded Metal Arc Welding (SMAW) is frequently chosen for site installation and facility repairs because it does not require external shielding gas. Processes like TIG or MIG rely on inert gas, which wind can easily blow away, leading to porosity defects.
The flux coating on a stick electrode creates its own shielding environment, making it a reliable option for drafty factory floors, outdoor piping, or tight spaces where moving a gas cylinder is impractical.
Thin Sheet and Visible Parts
Stainless steel retains heat longer and expands significantly more than carbon steel. Because stick welding generally inputs more heat into the base metal than TIG, it heavily increases the risk of warping and burn-through. For stainless sheet under 1.5mm (16 gauge), stick welding becomes highly impractical without specialized copper backing.
Furthermore, stick welding leaves slag and spatter. If your order requires a flawless cosmetic finish or sanitary food-grade polishing, the aggressive manual cleanup required makes SMAW much less cost-effective than TIG.
SMAW vs. TIG vs. MIG
No single welding process fits every stainless steel order. The choice depends on the operating environment, material thickness, and production volume.
| Process | Field Conditions | Thin Material Control | Post-Weld Cleanup | Volume Production Efficiency |
| SMAW (Stick) | Reliable in drafts and wind | Difficult (<1.5mm risks severe distortion) | High (adds manual labor cost for slag/spatter) | Low (frequent electrode changes) |
| GTAW (TIG) | Poor (gas blows away) | Excellent (precise heat control) | Low (no slag, weld is often ready-to-use) | Low to Medium (slow travel speed) |
| GMAW (MIG) | Poor (gas blows away) | Good (especially with pulse) | Medium (minor spatter removal) | High (continuous wire feed) |
Which Stainless Stick Electrode Should You Use?
Using the wrong filler metal permanently compromises your part’s corrosion resistance. Here is the exact breakdown for matching electrodes to your specific base metals and operating conditions.
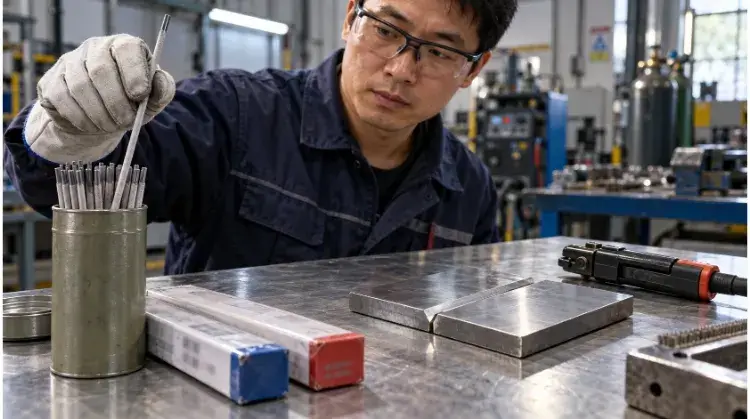
304 and 316 Base Metals
Following AWS A5.4 specifications, selecting the correct filler metal is necessary to maintain the corrosion resistance of the stainless steel base. The baseline rule is to match or slightly over-alloy the base metal. For common austenitic grades, the standard pairings are:
| Base Material Grade | Standard Electrode | Key Characteristic |
| 304 / 304L | E308L | Matches standard austenitic stainless steel. |
| 316 / 316L | E316L | Contains molybdenum for marine or chemical environments. |
The “L” suffix indicates an extra-low carbon content (under 0.04%). This prevents carbide precipitation in the heat-affected zone, maintaining the metal’s rust resistance. While these are standard baselines, final selection must align with the specific operating environment and the electrode manufacturer’s technical data.
Stainless-to-Carbon Steel Joints
When joining stainless steel to carbon steel—such as welding a 304 stainless mounting bracket to a standard structural steel base—E309L is the standard choice. Its higher chromium and nickel content accounts for the dilution that occurs when melting into carbon steel, handling the different thermal expansion rates and reducing crack risks.
Cost Note: E309L is heavily alloyed and more expensive. Do not use it as a universal rod for standard 304-to-304 joints just to simplify inventory. Also, remember that the carbon steel side of the joint will still require standard rust prevention after welding.
Rod Suffixes and Polarity
Beyond the alloy grade, stainless electrodes feature suffixes like -15, -16, and -17 indicating the flux coating composition. This coating directly dictates the arc behavior and permitted welding positions:
- -15 (Basic coating): Freezes quickly, designed for out-of-position work such as vertical-up or overhead joints.
- -16 (Rutile/Titania coating): The most common shop standard, providing a stable arc and easy slag removal for flat and horizontal positions.
- -17 (Silica-Titania coating): Produces a very flat or slightly concave bead profile with exceptionally easy slag release, often serving as a cosmetic alternative for flat welds.
Specific polarity (usually DCEP for stainless) and amperage settings depend on the exact electrode diameter and the manufacturer’s data sheet, which should be verified before striking an arc.
How to Prepare the Joint Before Welding?
Poor preparation is the leading cause of failed stainless welds. Controlling contamination and joint fit-up before striking an arc dictates the final part quality and prevents expensive rework.
Clean Surfaces and Dedicated Tools
Any oil, grease, or moisture on the joint will cause porosity. Clean the weld zone thoroughly with an approved solvent like acetone before starting. Additionally, store electrodes in a rod oven according to the manufacturer’s product data to prevent moisture absorption.
More importantly, your shop must use dedicated stainless steel tools. Many ISO-certified shops strictly color-code their stainless brushes and grinding wheels to prevent accidental mixing. If a grinder used on carbon steel touches a stainless part, it embeds microscopic iron particles. This cross-contamination causes immediate rust spots (tea staining) upon delivery, leading to rejected batches.
Fit-Up and Backside Access
Stainless steel is highly sensitive to excessive heat input, making tight joint fit-up critical. If the CAD design leaves a root gap wider than the material thickness, the welder is forced to weave and add massive heat just to bridge the gap. This practically guarantees a warped part. Beveling is necessary for thicker plates to ensure full penetration, but the specific angle depends entirely on the joint design.
Finally, consider backside access. If you cannot reach the backside of the joint to chip slag, a tight fit-up and a flawless root pass become your only line of defense against trapped inclusions.
Clamping and Weld Sequence
To counteract the high thermal expansion rate of stainless steel, secure the parts with rigid clamping and frequent tack welds. The welding sequence heavily influences final dimensional accuracy. Techniques like back-stepping or alternating sides on a heavy assembly help distribute heat stress evenly.
Copper backing bars work well as an optional method to draw heat away from the weld zone. They also support the root pass, though their necessity depends on the specific heat tolerance and thickness of the assembly.
How to Avoid Common Stainless Weld Defects?
Balancing heat input and fusion is the core challenge when stick welding stainless steel. Recognizing defect signs early keeps rework costs manageable and prevents scrapping assembled units.
Current and Arc Length
Because stainless steel has low thermal conductivity, heat stays concentrated in the weld puddle. Operating at an amperage that is too high increases the risk of burn-through, severe warping, and loss of corrosion resistance. This damage is often indicated by a dark, crusty heat tint.
Once severe heat tint happens, light chemical passivation won’t fix it. The part will require aggressive mechanical grinding or heavy acid pickling, destroying dimensional tolerances and labor budgets. Conversely, running the current too low causes a lack of fusion. Maintain a short arc length tailored to the electrode diameter to minimize voltage spikes.
Beads and Multiple Passes
Use narrow stringer beads rather than wide weaving motions. Weaving increases heat input and slows down the travel speed, which degrades the base metal’s properties. For heavy joints requiring multiple passes, strict interpass temperature control is necessary.
Allow the part to cool below the specified limit (often under 150°C/300°F) before initiating the next pass. Thoroughly chip the slag and wire-brush the weld between every pass. Stainless slag is dense, and welding over it guarantees inclusions.
Defect Signs and First Checks
Catching these signs early keeps rework confined to a quick grind-out, rather than scrapping a fully assembled unit. When a weld fails visual inspection, use this baseline to trace the root cause before adjusting the machine.
| Defect Sign | First Conditions to Check |
| Burn-through / Excessive Penetration | Amperage is too high, or the joint root gap is too wide. |
| Slag Inclusions | Incomplete interpass cleaning, or incorrect electrode angle. |
| Porosity (Pinholes) | Damp electrodes, dirty base metal, or arc length is too long. |
| Undercut (Grooves at weld toes) | Travel speed is too fast, or arc length is too long. |
| Severe Distortion / Warping | Inadequate clamping, excessive heat input, or poor weld sequence. |
| Lack of Fusion | Amperage is too low, travel speed is too fast, or joint bevel is insufficient. |
Workshop Safety Note: Stick welding stainless steel generates welding fumes containing hexavalent chromium, a highly toxic byproduct. Proper ventilation, local exhaust ventilation (LEV) systems, and necessary respiratory protection should be determined based on the specific work environment, exposure levels, and local occupational safety regulations (e.g., OSHA).
How to Clean and Inspect the Finished Weld?
A visually clean weld does not guarantee a corrosion-resistant part. Proper post-weld inspection and surface treatment are mandatory to prevent premature field failures and rejected deliveries.
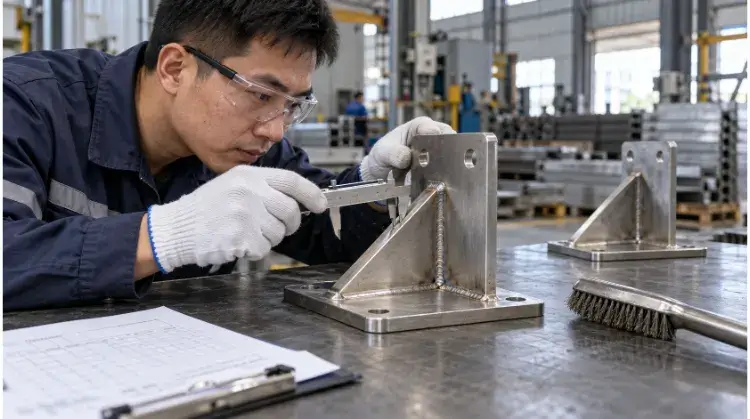
Slag, Spatter, and Heat Tint
Post-weld cleaning begins with mechanical removal. Slag must be chipped away, and any localized spatter must be ground off using dedicated stainless steel tools. However, simply grinding the weld flush does not mean the metal is fully restored.
The welding arc leaves behind a heat tint—a discolored surface oxide layer that is severely depleted of chromium. If this depleted layer isn’t removed or chemically treated, the part will inevitably rust in the field, regardless of how shiny the mechanical polish looks to the naked eye.
Pickling vs. Passivation
To restore true corrosion resistance, chemical treatments are often required, but they serve different purposes. Pickling uses highly aggressive acids to literally dissolve away the heavy oxide scale, weld tint, and the chromium-depleted layer beneath it.
Passivation is a milder chemical process (often citric or nitric acid-based) that promotes the rapid formation of the invisible chromium-oxide shield without altering the physical surface finish. While crucial for marine or sanitary applications, these chemical steps add cost; they should be specified based on the part’s actual operating environment, rather than applied blindly as a mandatory step for every non-critical component.
Dimensions and Weld Quality
Quality control starts with verifying the physical geometry. Inspectors must check the weld profile for correct sizing and ensure no surface defects, like undercut or porosity, remain exposed. Beyond the weld bead itself, the overall assembly must be measured against the CAD tolerances to confirm that heat distortion hasn’t warped critical mounting points out of spec.
Further Non-Destructive Testing (NDT) should only be specified when the structural application strictly demands it. Over-specifying X-ray or dye penetrant testing on non-critical brackets can easily triple your part cost with zero added functional value.
What Makes Stick Welding Cost More in Production?
While a stick welding machine is inexpensive, the hidden manual labor costs quickly multiply. Understanding these operational expenses explains why stick-welded parts often carry higher per-unit quotes.
Welding and Cleanup Time
Processes like TIG and MIG allow for near-continuous welding. Stick welding, by its nature, is a stop-and-go process. The operator must strike an arc, weld for a few inches, stop to discard the consumed electrode stub, reload the stinger, chip the heavy slag, and wire-brush the joint before starting the next pass.
In many stainless fabrication projects, for every hour of actual stick welding, operators spend two hours on mechanical cleanup, grinding, and blending. This 1:2 ratio drastically lowers actual arc-on time and is exactly why SMAW struggles to compete with MIG or TIG in high-volume production runs.
Finishing, Inspection, and Rework
The true cost of stick welding often hides in the finishing department. Aggressive spatter removal and blending out minor surface irregularities require heavy manual grinding, which slows down production flow.
While this heavy labor cost is perfectly acceptable—and often necessary—for a critical one-off field repair where other methods fail, it destroys profit margins if specified for high-volume repeat production. The higher the volume, the more cost-effective automated or semi-automated processes become.
A Quote-Ready Specification
To get an accurate manufacturing quote that accounts for the right welding process and avoids hidden rework charges (or inflated “guesswork” margins), provide your fabricator with a complete specification. Ensure your next RFQ includes:
- Base material grade and exact thickness.
- CAD drawings with explicit weld callouts (sizes and locations).
- Order quantity and the expected operating environment.
- Required post-weld surface finish (e.g., as-welded, ground flush, pickled & passivated).
- Specific inspection, NDT, or certification requirements.
Ready to move your project forward?
Submit your CAD drawings and operating requirements to our engineering team today. We will provide a free Design for Manufacturability (DFM) review, evaluate the most cost-effective welding process for your design, and deliver a comprehensive, transparent manufacturing quote.