
In mechanical design and manufacturing, the terms “tapped hole” and “threaded hole” are often used interchangeably, but treating them as the same thing is an expensive mistake. The distinction dictates tooling requirements, CNC cycle times, and ultimately, the cost per part.
When you specify a hole on a drawing, you are communicating with the machine shop. If you use the wrong terminology, you force a manufacturer into a rigid, suboptimal process. Here is the bottom line up front: a threaded hole is the geometric feature you want; a tapped hole is just one specific way to make it.
This guide breaks down the engineering differences, the manufacturing processes, and how your design choices directly impact production costs on the shop floor.
Tapped Hole vs Threaded Hole
To optimize a part for manufacturing, you must separate the design intent from the manufacturing process. Standards like ASME Y14.5 and ISO exist to define final geometry, not to dictate how the machinist does their job.
What is a threaded hole?
A threaded hole is the final physical feature: a cylindrical void containing internal threads designed to accept a specific mating fastener.
When you specify a “threaded hole,” you are defining the geometry and the required standard. You are telling the manufacturer what you need, but you are leaving the how up to them. The shop can choose to create those threads using a tap, a thread mill, a lathe, or an insert, depending on what is most cost-effective for their equipment and your chosen material.
What is a tapped hole?
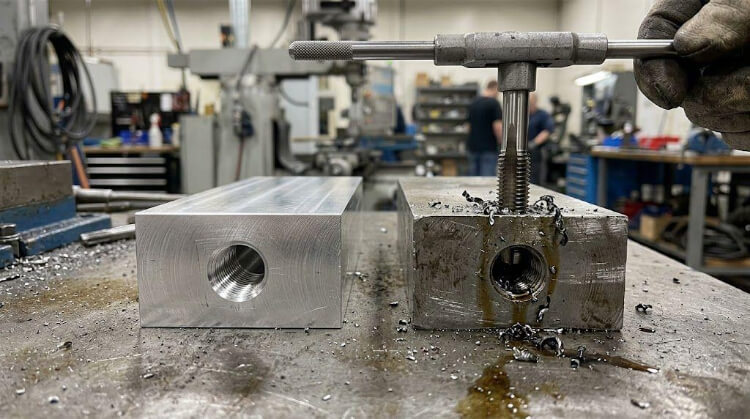
A tapped hole is a threaded hole that has been created using a specific rotary tool known as a “tap.”
Tapping is a manufacturing operation. The tool is driven into a pre-drilled pilot hole to cut or displace material and form the threads. Specifying a “tapped hole” explicitly limits the machinist to using this exact tooling method.
How Internal Threads Are Made?
Machine shops have several methods for putting threads into a part. The right choice depends on the material hardness, the hole geometry, and the production volume.
Cutting taps
Cutting taps is the most traditional method. The tap is driven into a pilot hole, and its fluted cutting edges shear away material to carve the thread profile.
- The Advantage: Speed and low tooling cost. In a soft material like 6061 aluminum, a cutting tap might finish a hole in just 2 seconds. For high-volume production, this translates to massive cycle time savings.
- The Drawback: Cutting taps produces chips. In a blind hole, chips can pack into the bottom, causing the tap to snap. If a tap breaks inside an expensive part, extracting it is a nightmare that often results in scrapping the entire workpiece. Furthermore, a tap cannot be adjusted; it cuts the size it was manufactured to cut.
Thread milling
Thread milling utilizes a multi-point cutting tool that is smaller than the hole diameter, using helical CNC interpolation (moving in X, Y, and Z simultaneously) to carve the threads.
- The Advantage: Precision and Safety. Because the tool is smaller than the hole, chip evacuation is flawless. If a thread mill breaks, it simply drops out of the hole—saving a potentially expensive part. More importantly, thread milling allows the CNC machinist to use tool wear compensation (Cutter Radius Compensation) to adjust the pitch diameter by fractions of a millimeter.
- The Drawback: It requires high-speed CNC capabilities and takes longer per hole. Threading a deep hole might take 10 to 15 seconds with a thread mill compared to 2 seconds with a tap.
Pro Tip: Always lean towards thread milling for hardened metals (like 304 Stainless or Inconel), high-value parts where scrap is unacceptable, or when you need tight Class 3B (or 4H) thread fits.
Forming taps (Roll Tapping)
Also known as fluteless taps, forming taps do not cut material; they displace it. They use pressure to cold-form the metal into the thread profile.
- The Advantage: Because no material is removed, there are zero chips to evacuate, making this an excellent choice for deep blind holes. The cold-working process also compresses the metal grain structure (work hardening), resulting in threads that have significantly higher tensile strength and fatigue resistance.
- The Drawback: This process only works on highly ductile materials, typically those with a hardness below 30 HRC (like aluminum, brass, or mild steel). Additionally, the pilot hole size must be calculated and drilled with extreme precision; the tolerance window for a forming tap pilot hole is much tighter than for a cutting tap.

Inserts for thin or weak parts
Sometimes, the base material cannot support a reliable thread.
- Sheet Metal Constraints: Rule of Thumb: If your material thickness is less than 1.5 to 2 times the thread pitch, tapping is a liability. You will not get the minimum 3 to 4 full threads required for a secure joint. Tapping or milling is physically impossible here. Instead, you must specify press-fit hardware (like PEM nuts) or rivet nuts.
- Soft Plastics/Metals: In parts made from soft plastics, or in structural parts that need to be taken apart often, threads cut directly into the base material usually wear out over time. The threads can strip because the base material is not strong enough to handle repeated use. A common engineering solution is to install helical inserts, or key-locking inserts. These inserts create a stronger and more wear-resistant threaded hole.
What Affects the Best Thread Method?
If you leave the manufacturing method open on your drawing, the CNC programmer decides how to make the thread. Their choice—and your final quote—is driven by seven risk and tooling factors.
Part type
Machinists look at the scrap liability of the part. If they are threading a $5 aluminum bracket, a high-speed cutting tap makes sense. If they are threading a $2,000 complex titanium manifold, they will thread mill. A broken tap scraps the part; a broken thread mill does not.
Material
Hard metals (tool steel, titanium) destroy taps, making thread milling the only safe choice. Ductile metals (6061 aluminum, brass) are perfect for forming taps, which create a stronger thread without producing chips. Gummy metals (304 stainless) require thread milling or specialized cutting taps to avoid work-hardening and tool breakage.
Blind hole vs through hole
Through holes easily push chips out the bottom. Blind holes trap chips, which will snap a standard tap. To safely thread a blind hole, shops must use spiral flute taps, chip-free forming taps, or thread mills.
Thread size and pitch
Micro-threads (e.g., M1.6 or #0-80) use incredibly fragile tools; shops often use forming taps here to avoid snapping tiny cutting edges. Massive threads (e.g., M36 or 1″-8) require immense spindle torque to tap. Most standard CNC machines lack this power, making thread milling mandatory for large diameters.
Thread depth and engagement
Any hole deeper than 3 times its diameter (3D) is a “deep hole.” Deep hole tapping is risky because the coolant can’t easily reach the cutting edge, and chips get packed in. For deep engagements, expect shops to quote slower thread milling or forming processes, increasing your part price.
Repeated assembly
Bare threads in soft materials (aluminum, plastic) will quickly cross-thread or strip if the bolt is removed regularly. In stainless steel, bare threads are prone to galling. If a part requires repeated assembly, the best method is to machine an oversized hole and install a stainless steel Helicoil or key-locking insert.
Thin sheet metal limits
A secure joint requires 3 to 4 full threads of engagement. If your material thickness is less than 1.5 times the thread pitch, tapping is physically impossible. You must specify press-fit hardware (PEM nuts) or rivet nuts instead.
Quick Reference: Threading Method Decision Matrix
| Material Type | Hole Type | Recommended Method | Risk / Cost Factor |
| Aluminum / Brass | Through | Cutting Tap | Lowest Cost, Fastest Cycle |
| Aluminum / Brass | Blind | Forming Tap (Roll Tap) | Zero Chips, Stronger Thread |
| Tool Steel / Titanium | Any | Thread Milling | High Safety, Zero Scrap Risk |
| 304/316 Stainless | Blind | Thread Milling | Prevents Work Hardening / Broken Taps |
| Sheet Metal (< 2x Pitch) | Any | Insert (PEM / Rivet Nut) | Mandatory for structural integrity |
How to Specify Threads on a Drawing?
Over-specifying costs you money; under-specifying gets you rejected parts. Here is how to write engineering callouts that get you exactly what you need without inflating the quote.
When is a ” threaded hole ” enough?
In 95% of commercial manufacturing, defining the geometric feature is all you need. A callout like 4X M6 x 1.0 – 6H tells the shop exactly what standard to meet. It allows them to look at their tooling and material, and pick the cheapest, most reliable way to pass your quality inspection.
When to call out tapping?
Only specify “tapping” if the structural integrity of your part relies on the specific grain structure created by that process. For example, extremely high-pressure hydraulic components or certain aerospace MIL-SPECs require the work-hardened, compressed threads that only a forming tap provides. In this rare scenario, specify: M8 x 1.25 – 6H FORM TAPPED.
When to define the thread and leave the method open?
Always separate the drill depth from the thread depth. A machine shop cannot thread perfectly to the flat bottom of a drilled hole because the tool needs physical clearance.
- Professional Callout: Ø5.00 ↧ 15.0 (Drill depth) / M6 x 1.0 – 6H ↧ 10.0 (Thread depth). This defines the feature while giving the machinist a critical 5mm of clearance for chips to fall.
Common callout mistakes
- Forcing full threads to the absolute bottom: This is the #1 reason for inflated quotes. Demanding full threads to the exact bottom of a blind hole forces the shop to use specialized bottoming taps and manual secondary operations, often multiplying the cost of that feature by 300%. Always leave 2 to 3 unthreaded pitches at the bottom.
- Specifying the pilot hole size: Do not explicitly draw a 5.0mm hole for an M6 thread. A cutting tap might need a 5.0mm hole, but a forming tap needs 5.5mm. Call out the final thread size and let the shop calculate their own prep diameter.
Fit and thread quality
Class 2B (Imperial) or 6H (Metric) is the standard commercial fit. Hitting a tighter Class 3B / 4H tolerance reliably with a standard tap is incredibly difficult as the tool wears.
If you specify 3B, you force the shop to switch to slower thread milling to guarantee the part passes a Go/No-Go gauge inspection. Only specify precision fits if your assembly truly requires them.
What Drives Cost and Production Risk?
When a manufacturer quotes your part, they aren’t just calculating machine time; they are pricing in the risk of failure. Understanding what drives this risk helps you design out unnecessary costs before you ever send an RFQ.
Speed vs flexibility
Tapping is incredibly fast. A rigid tapping cycle on a modern CNC can thread a hole in a matter of seconds. However, taps lack flexibility.
Every unique thread size and pitch requires a dedicated tool, taking up valuable space in the machine’s tool magazine. Thread milling is slower per hole, but a single tool can cut multiple thread sizes and both left- and right-hand threads.
Broken taps and scrap
This is the highest hidden cost in machining. If a $20 tap snaps inside a $1,000 aerospace component, the shop either has to spend hours burning the broken tap out with a plunge EDM or scrap the part entirely.
If your design includes deep blind holes in hard materials, shops will dramatically mark up the piece price to cover the insurance of potential scrap.
Pilot hole size
The quality of a thread is entirely dependent on the pilot hole. If the pilot hole is drilled too small, the tap will bind and break. If it is drilled too large, the thread will lack the required strength and fail a Go/No-Go gauge test.
Forming taps are especially risky in this case. They need a very tight tolerance on the pilot hole size. Because of that, the shop must spend more machine time checking drill wear and keeping the hole size under control.
Thin material problems
Trying to cut threads into thin sheet metal is a recipe for failure. If you are working with 16-gauge (1.5mm) or thinner sheet metal, standard tapping will not provide the minimum three threads of engagement required for structural integrity.
The fastener will strip out under minimal torque, leading to field failures and warranty claims. Pivot to press-fit hardware early in the design phase to save massive production headaches.
How to Choose the Right Option?
You don’t always need to specify the manufacturing method on your drawing explicitly, but understanding when each process is used helps you design better, more cost-effective parts.
When does tapping make sense?
Use standard cutting taps for high-volume production in easy-to-machine metals such as 6061-T6 aluminum, free-machining brass, or Q235 steel.
This method is usually the fastest and lowest-cost way to make a standard commercial thread, such as Class 2B or 6H, in a part. It works especially well for through holes, where chip removal is usually not a problem.
When is thread milling the safer choice?
Thread milling works like a form of protection in these cases. It is often the best choice for hard or costly materials such as titanium, tool steel, or Inconel, because a broken tool can ruin the whole part.
It is also the required method for large-diameter threaded holes, parts with uneven shapes that cannot be turned on a lathe, and precision assemblies that need a tight and clearly measurable Class 3B or 4H thread fit.
When are forming taps worth considering?
Use forming taps when you need stronger threads in ductile materials. They do not cut the metal. Instead, they press and shape it. Because of that, they work well in high-stress applications that use aluminum or copper.
They are also a good choice for deep blind holes. Forming taps produce no chips during the process. This removes the risk of chips building up inside the hole and lowers the chance of tool breakage.
When is an insert the better answer?
Stop trying to machine threads when the base material is working against you. Use press-fit hardware (like PEM nuts) or rivet nuts for sheet metal enclosures. Use Helicoils or key-locking inserts for soft plastics, or for any aluminum/magnesium parts that will be frequently assembled and disassembled by the end user.
Pro Tip: If your part will be powder-coated or anodized, install your inserts after the surface finishing process. Threading a hole before heavy surface treatments often leads to clogged threads and undersized pitch diameters, forcing you to chase the threads to get the bolt to fit manually.
Conclusion
The difference between a tapped hole and a threaded hole is not just a wording detail. A threaded hole is the result you need in the part. Tapping is only one way to create it. Once you look at the feature this way, the real decision becomes much clearer: choose the thread method based on the material, hole type, part thickness, thread size, production volume, and assembly needs.
In real production, the wrong thread choice can lead to broken taps, weak threads, extra rework, unstable quality, and unnecessary cost. The better approach is to define the thread requirement clearly on the drawing, then review whether tapping, thread milling, forming, or inserts make the most sense for that specific part. That is where better manufacturability and better cost control usually start.
If you are not sure which thread method fits your part, send us your drawing or 3D file for review. We can check the material, hole design, thread engagement, and production risk, then suggest a more reliable and cost-effective solution for your project.